- Lightroom Presets
- Mobile Presets
-
Photoshop
-
Learn
-
Support
-
Install
- Best Sellers
- Blog
By Tammy Porter on | No Comments

A fast and effective workflow aims to be efficient and keep you from having to backtrack or take unnecessary steps while editing or exporting.
In this tutorial, I will share my own Lightroom workflow, which is extremely fast and efficient. I will show you how I import, cull, develop, and export my photos step-by-step.
When I first began learning Lightroom, I remember asking myself, "What is Workflow"? I kept reading about the importance of having a fast Lightroom workflow, but honestly, I had no idea what it was or if I was doing it correctly.
Workflow refers to a consistent process or sequence of steps through which a piece of work passes from initiation to completion. In photography, workflow refers to all the actions you take in Lightroom (or Photoshop), beginning with Import and ending with Export. In between, a Lightroom workflow will help guide the organization, culling, and editing of your images into a final product.
Let's take a closer look at the Lightroom workflow process:
The first step in my Lightroom Workflow is to import my photos. Make sure you don’t rush this step in excitement to see them!
You will typically import using your computer's Card Reader or an external Card Reader. To get started, open Lightroom and click Import.
Tip: My Lightroom is set to automatically open the Import dialog when a memory card is inserted. You can use your Lightroom to do this by clicking on the Preferences>General Tab and putting a checkmark in the "Show Import Dialog When a Memory Card is Detected" box.
Once the Import dialog box opens, on the left, you will choose the source, or in other words, the location where your photos are coming from. Typically, this is your SD card. On the right, you will choose where you want to files to go (i.e., your computer hard drive or an external hard drive).
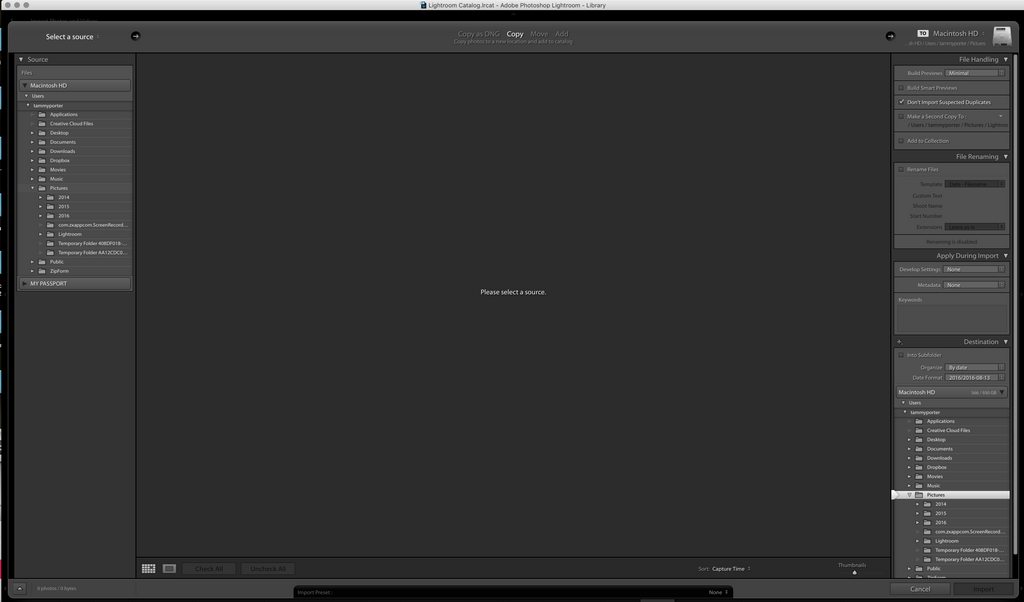
The options on the right side of your screen are IMPORTANT to review and set properly. You should go through each tab CAREFULLY. Once this is done, you will rarely need to change these settings, and subsequent imports won't take as long as the initial one.
There are multiple ways to do this, but I will review what works best for me:
Now that the import settings are established, choose the photos you want to import by using the box at the bottom of your screen. Select either “Check All,” or if you're going to pick and choose, go ahead and manually click each image files you want to import.

The next step is where you will Cull and Flag your images. This is done in the Library Module of Lightroom.
I always start with the first photo and decide on each image RIGHT AWAY rather than browsing through everything haphazardly. I use the following Lightroom keyboard shortcuts to flag or remove an image from the filmstrip:

I also use the “Auto Advance” feature to automatically advance to the next image once I choose P or X. You can turn on Auto Advance on your top menu bar under "Photo>Auto Advance." This saves time because you won't have to use the mouse or arrow keys to advance to the next image in your filmstrip.
I am pretty harsh with my image culling. If the photo is out of focus, composed wrong, or not immediately appealing, I give it an X. I try to Flag (pick) only the best shots. Trust your instincts. If the photo catches your eye, it will also catch other eyes. I generally try to flag 3 or 4 options of each pose or setup to choose from later.
Once culling is complete, press "Cmd/Ctrl + Delete" - you will get a pop-up asking if you want the “X” images to be deleted from Lightroom only or your computer entirely. How you answer is entirely up to you, but I usually choose to delete these images from my computer.
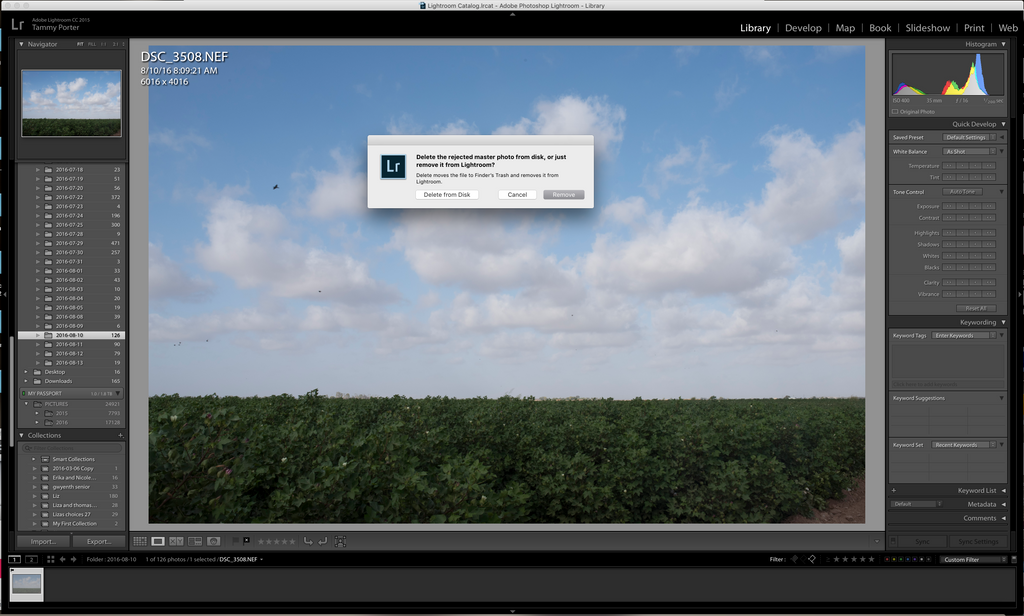
The next step is to choose the best shots from your Flagged images to edit. I use the Quick Collection for this.
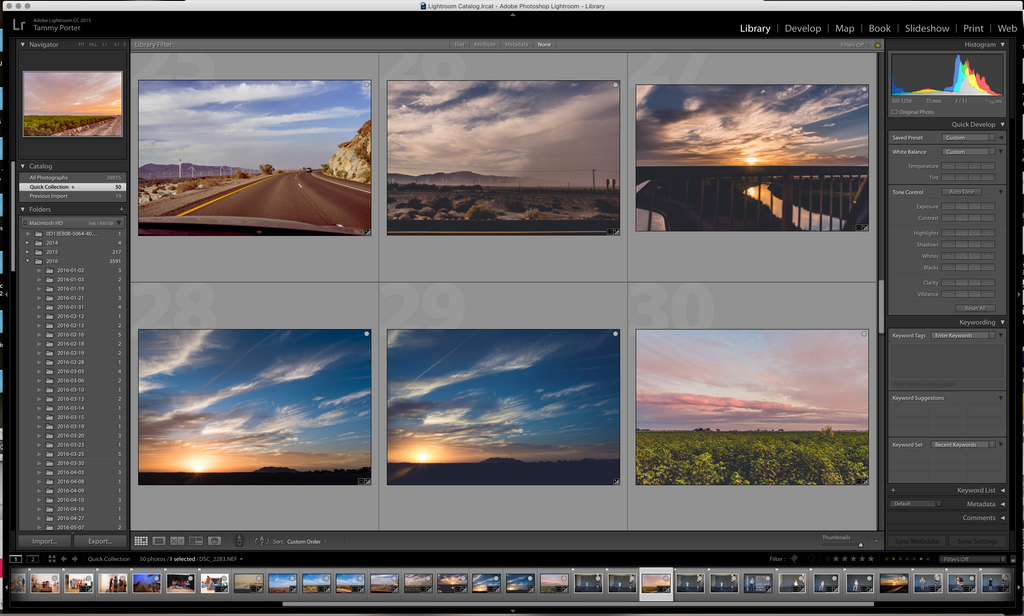
At this step in my Workflow, I am still in the Library Module, with the Grid View turned on and images set for large and three across in each row. As I go through my images, I pick the best shots to edit by clicking the small grey dot in the upper right-hand corner of the photos. This will move it into your Quick Collection. Keep in mind the image will also remain in its original file.
Next, click "Quick Collection," located on the left-hand side of your screen at the very top of the Catalog Menu. You will now be looking at your highly culled, best of the best images that you will edit and potentially present to your client.
Now for the fun part! Editing!
My first step when working with portraits is to touch up skin and enhance eyes using my Perfect Portrait Brushes and heal/clone tool.
When working with a landscape photo, I use the clone tool to remove unwanted spots, birds, trash, or whatever may be distracting in my photo. I always do this before applying presets or adjusting any other sliders!
The next step is choosing and applying the preset I want to use. This is so much fun and only takes a few moments! Once my desired preset is applied, I adjust sliders as needed, apply hand edits, and use radial/linear gradients to get the look just right for my style.
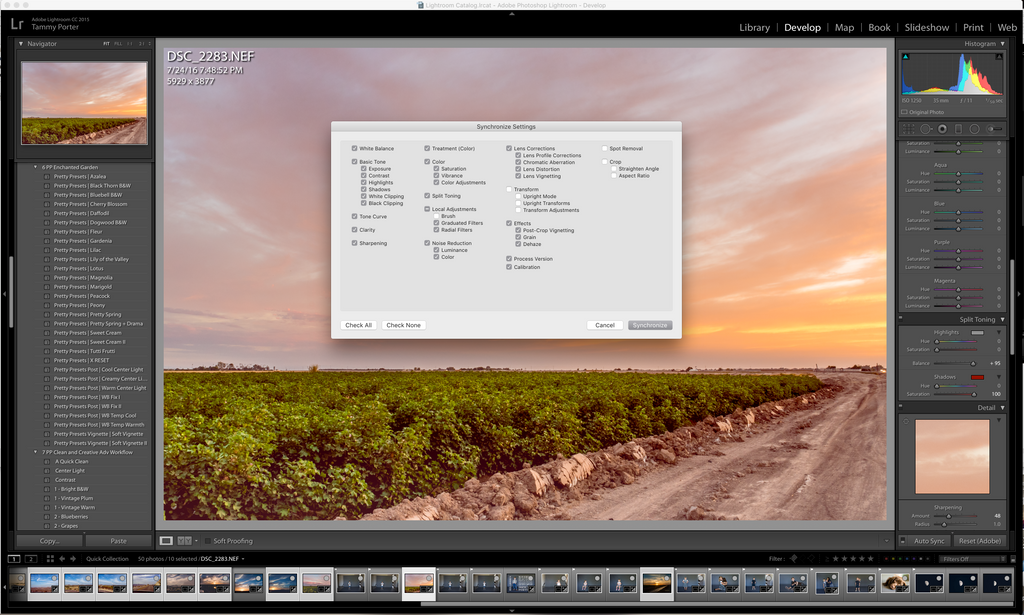
Once the photo is completely edited, look through the filmstrip at the bottom of the screen and highlight any other images with similar lighting and feel (using CMD/CTRL and clicking with the mouse). Click the Sync Button located at the bottom right. This will open some options to choose from that will sync (copy) specific edits from the fully edited image to similar photos you selected from the filmstrip.
I usually sync ALL THE OPTIONS EXCEPT crop, transform, and the brush tool. Lightroom will automatically sync the edits from your main image to all the other photos you selected. This is seriously like magic, and once you start using the sync shortcut, you will never want to edit without it. It saves so much time!
I always end my editing session using the Grid View (bottom left), so I can view the photos side by side. Now is when I adjust radial and linear gradients, white balance, overall exposure, and double-check my horizon lines for straightness.
It is easy to see if a photo is overexposed, underexposed, too warm, or too cool when you can compare the images side by side. This method also ensures a smooth look and flow through the whole series of images which is important when printing and creating slideshows and collages (discussed below).

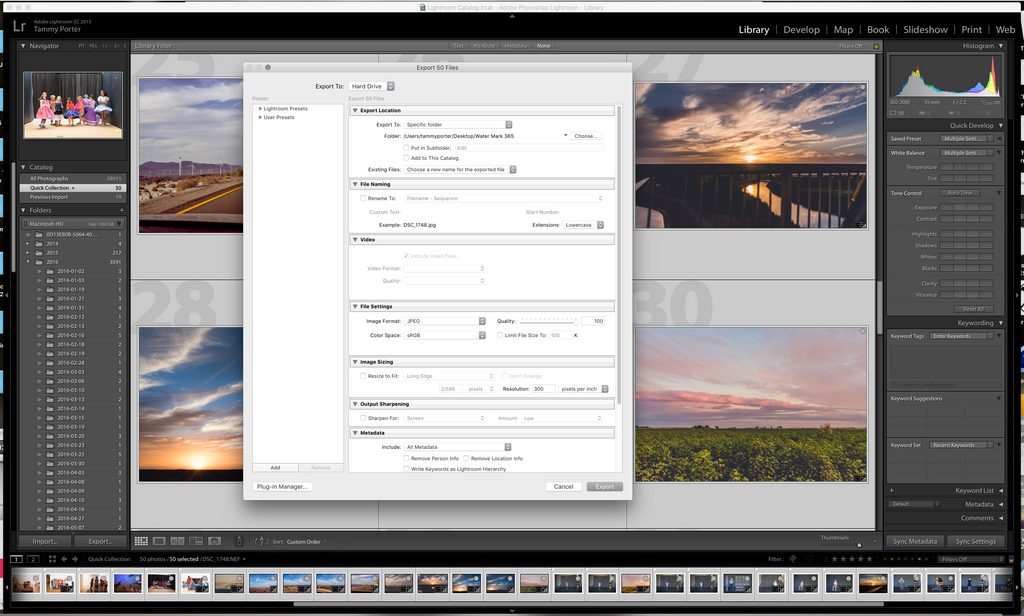
Once editing is complete, it's time to export the images for print or web. Use "CMD/CTRL + mouse click" to highlight the first photo on the filmstrip and then "Shift + mouse click" on the last image in the filmstrip to highlight ALL of the photos in between.
Next, right-click within your photo to bring up the window with Export>Export. An export dialog box will pop up where you will choose how and where your images are saved.
I save my photos in two different places:
I like to have both options available from the start, so if I want to post a photo publicly, I will already have a watermarked version to use without going back into LR to search for it and re-export. Keep the two different versions in separate, clearly marked folders so you don't accidentally print a client photo with a watermark on it.
This process will be very fast if you follow these export steps with all of your images highlighted (as discussed above).
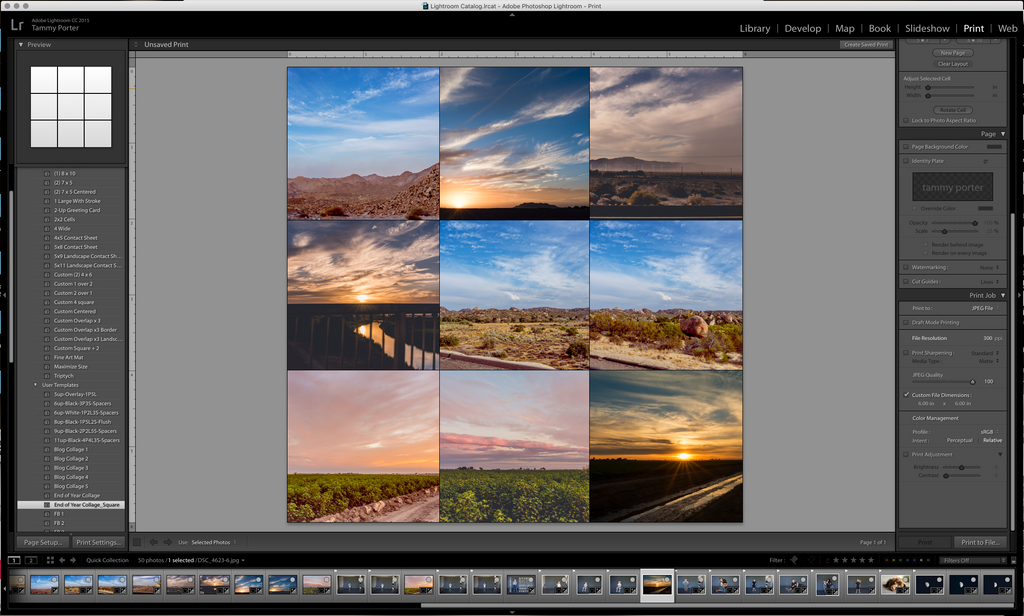
While still in the Quick Collection, now is the perfect time to use the Slideshow Module to create a slideshow you can use to help sell your photos or as a sneak peek for your clients. If desired, it's also a great time to use the Print Module to create a beautiful photo collage.
I like to do this from the Quick Collection because the photos here represent the best of the best images that have already been culled and edited. It will auto load them into the Slideshow or Print Modules without any unwanted or unedited versions that may still be in the original files.
When saving a slideshow, I set the Quality to "High" and then click the "Export Video" button located on the lower left-hand side of the module.

When saving a collage in the Print Module, I set the DPI to "300", turn off "Sharpening," set JPEG Quality to "100", then click the Print to File Button on the lower right-hand side of the module.
With quite a few years under my belt as a professional photographer, I genuinely believe that this Lightroom Workflow process reinforced with Pretty Presets, Actions, and Overlays has contributed significantly to my photography business success and allows me to spend much more time shooting and less time editing. If you are learning Lightroom or just want to become more efficient, give these Lightroom Workflow best practices a try!
Do you have any questions or comments about Lightroom Workflow? Leave us a comment below - We would LOVE to hear from you! And PLEASE SHARE our tutorial using the social sharing buttons (we really appreciate it!)




Tammy is a child photographer based in the desert of Arizona. A mother of two, a wife, and a secret lover of interior design. She spends her days juggling a hair salon, a budding children's jewelry line, and her camera. Photography is the driving force behind her relentless need to create beautiful things. You can follow her on Facebook.

Comments