- Lightroom Presets
- Mobile Presets
-
Photoshop
-
Learn
-
Support
-
Install
- Best Sellers
- Blog
By Amanda Glisson on | No Comments

Have you ever wondered how others achieve beautiful, vibrant color pop in their images?
Color Pop can be achieved quite easily using Photoshop and in this tutorial, I will show you how to create this beautiful vibrant look in 3 quick steps. In fact it's so easy and fun, it may just become your new favorite Photoshop trick!
First thing’s first, let’s start off by adding a Hue/Saturation layer. To do this, navigate to the top menu bar and select: Layer>New Adjustment Layer>Hue/Saturation.
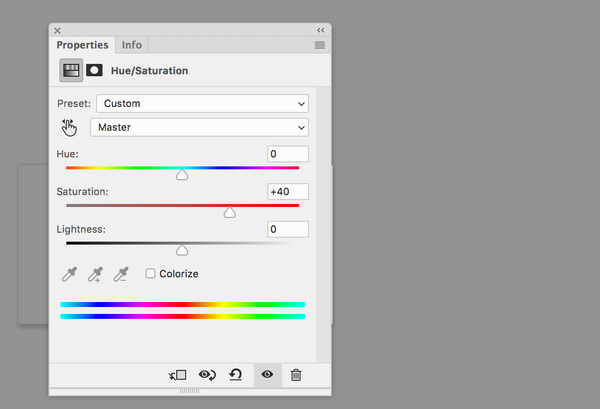
The Hue/Saturation Panel will appear on your screen and the only thing we are going to do here before closing out of this panel is to increase the saturation to about + 40. This adjustment will probably make your photo look overdone - which is totally normal at this stage of the edit, so don't panic. When we're done, it will not look so drastic, in fact it’s going to look absolutely amazing, so definitely don't worry about over-saturating your colors in this first step.
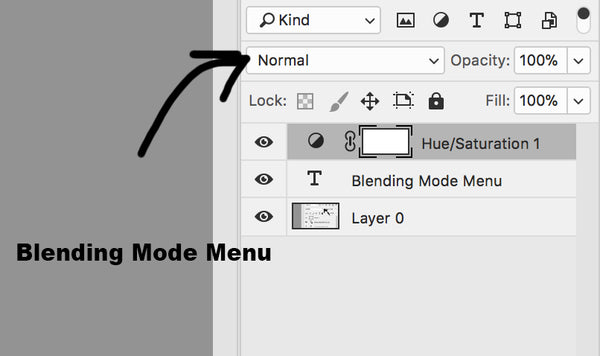
Next, you will want to change the Blending Mode to Overlay. To do this, locate the drop-down labeled “Normal” in your layers panel, make sure that your Hue/Saturation Layer is still selected, and then click on that drop-down and change the Blending Mode to Overlay.
You can also try switching between Overlay, Soft Light and Hard Light blending modes to see which looks best on your image.
At this point, the color pop on your image will still appear VERY MUCH OVERDONE. This is the point where we will reduce the color pop, by adjusting the layer opacity, so that the colors still looks rich and beautiful, but also much more natural.
Start off by bringing the layer opacity down to 0% and then slowly work your way back up until you find the color pop enhancement that works best for YOUR image.

You can also try adjusting with the individual colors in the master panel of the Hue/Saturation layer (double click on the layer icon to open it up). If you want to increase the saturation of a particular color or colors in your image, you may absolutely do so. This is a great way to give an extra color pop to specific colors in your image.
Keep in mind that the colors you are trying to adjust DO actually have to be present in your image in order to be able to increase or decrease the saturation of said colors.
If you are more of a visual learner, watch our How to Achieve Color Pop in Photoshop video below:
Color Pop is a beautiful effect to achieve and we hope this tutorial has given you some inspiration for editing in Photoshop.
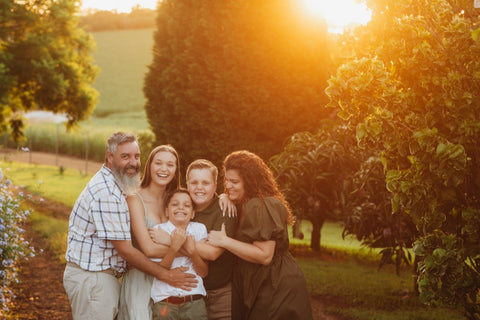
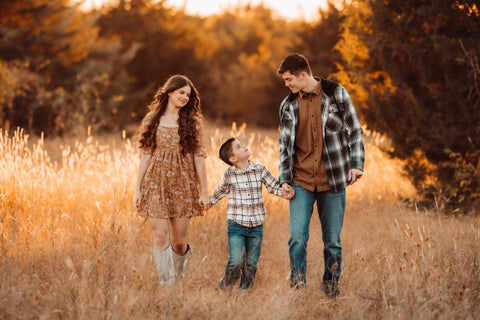
If you want to save even more time, Pretty Presets & Actions has some REALLY BEAUTIFUL one-click Photoshop Actions that are super easy to apply and will make color enhancement a breeze. For the edited image below, I used the Color Me Pretty and Selective Sharpen Actions as well as the Paint on Color Rich Brush - all from the Pure Color Workflow Photoshop Actions Collection.

Do you have any questions or comments about How to Color Pop in Photoshop? Leave us a comment below - We would LOVE to hear from you! And PLEASE SHARE our tutorial using the social sharing buttons (we really appreciate it!)

I'm a momma of four who, like a lot of other moms, found my love of photography through photographing my own beautiful children. Since first picking up a camera over 9 years ago and having professionally photographed all sorts of subjects and venues, I have come to learn that I am most passionate in newborn and child photography and I am lucky enough to be able to specialize in this area!

Comments