- Lightroom Presets
- Mobile Presets
-
Photoshop
-
Learn
-
Support
-
Install
- Best Sellers
- Blog
By Anna Gay on | No Comments

In this tutorial, I will show you one of my favorite ways to change the background color in Photoshop, with a couple of additional tweaks that will MAKE YOUR SUBJECT REALLY STAND OUT and the background look more natural.
This process is straightforward and fun, so let's get started:
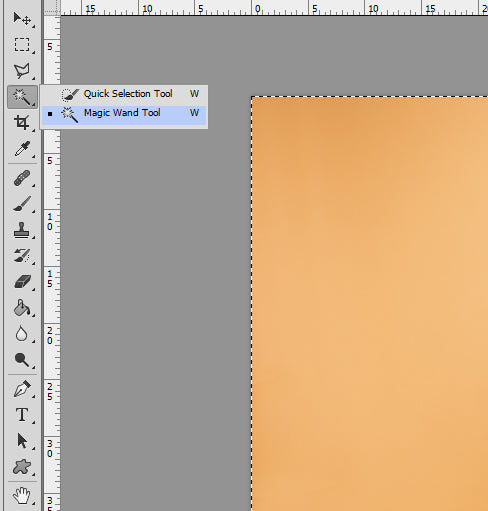
Open your image in Photoshop, and then select the Magic Wand tool:
I typically like to start at the top-left of my image and drag around the top of my subject, and then downwards, towards the bottom-right of the image:
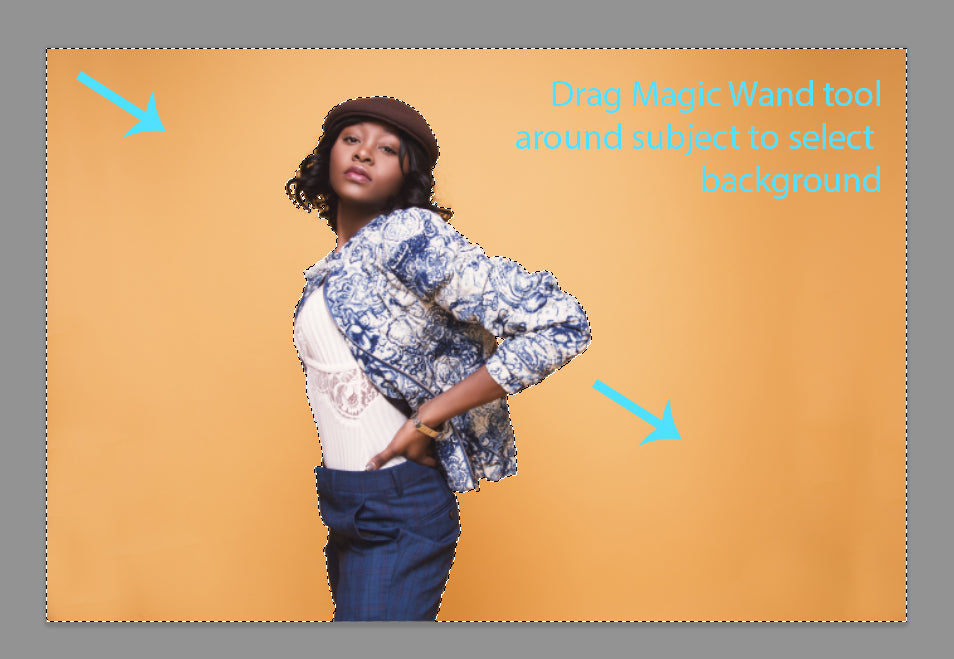
Once you have the bulk of your background selected, hold down the Shift key and click the smaller areas of the background that your initial wave of the Magic Wand (sorry, I couldn't resist) did not catch:

We need to change our selection from the background to the subject, and we can do that by right-clicking and going to Select Inverse:
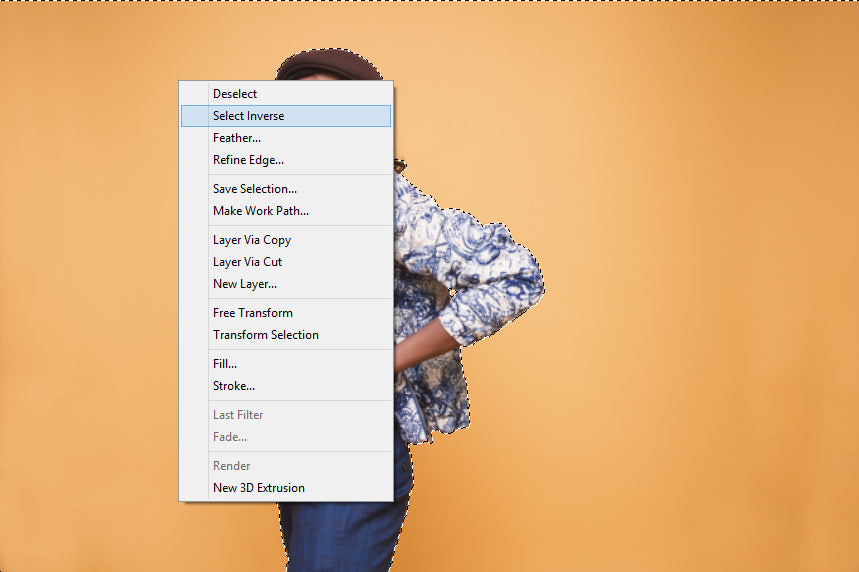
You will see the selection change from the background to the subject. Now go to Select>Refine Edge:
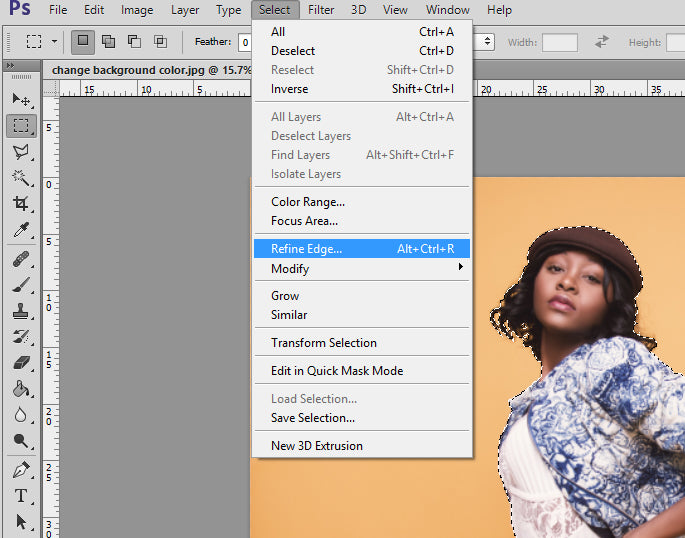
The Refine Edge window allows us to fine-tune the selection we just made. With the Magic Wand tool, you will usually have a good bit of the background remaining near the edges of your subject.
As you can see in the image below, there are some orange traces remaining on the model:
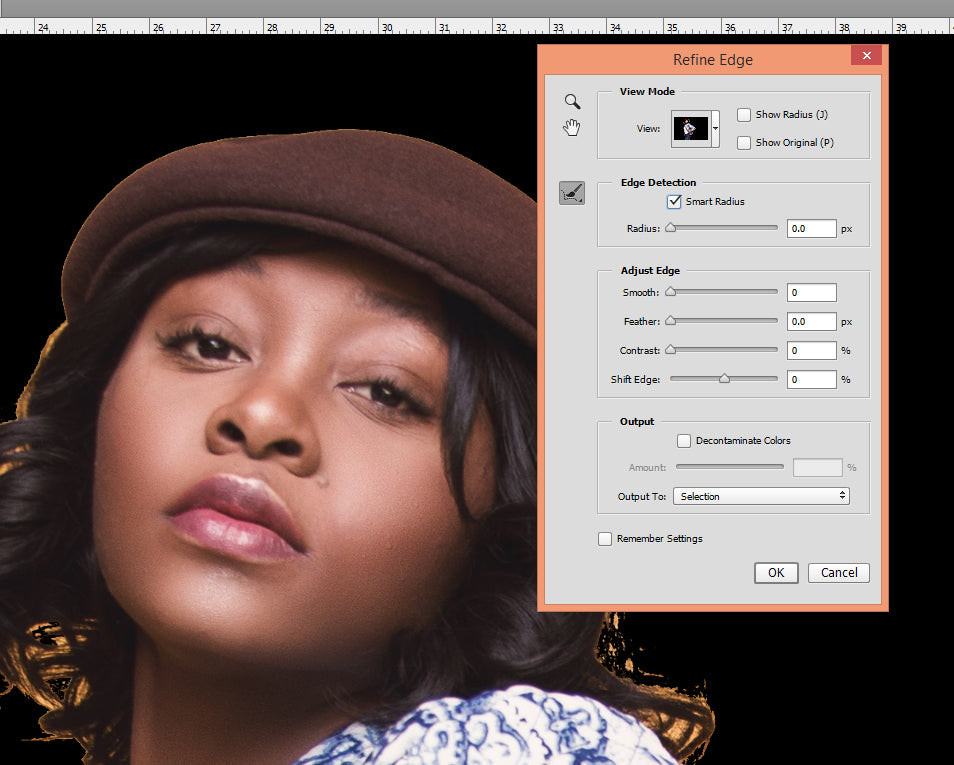
Use the drop-down menu to create a mask to view the selection. I find it easiest to use a mask that contrasts with the background color, so in this case, I chose to view my selection on black because I can more easily see the remaining bright orange near her hat, hair, and clothing.
For example, if your background was dark blue, you could choose to view your selection on white or transparent.
Now it's time to use the brush to paint over the edges where we still have the remaining orange background in our selection.
Click within your subject, and then draw along the edge where you would like to erase the background. Do this everywhere you see any background remaining in your selection. When you are finished, press OK.
Next, add a Layer Mask to your selection by clicking the Layer Mask icon:

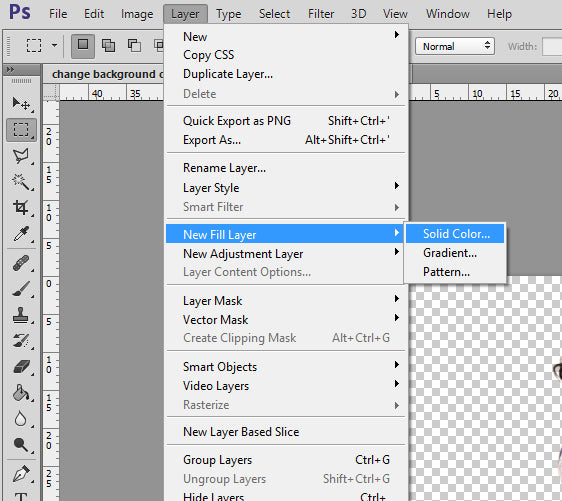
Go to Select Layer>New Fill Layer>Solid Color:
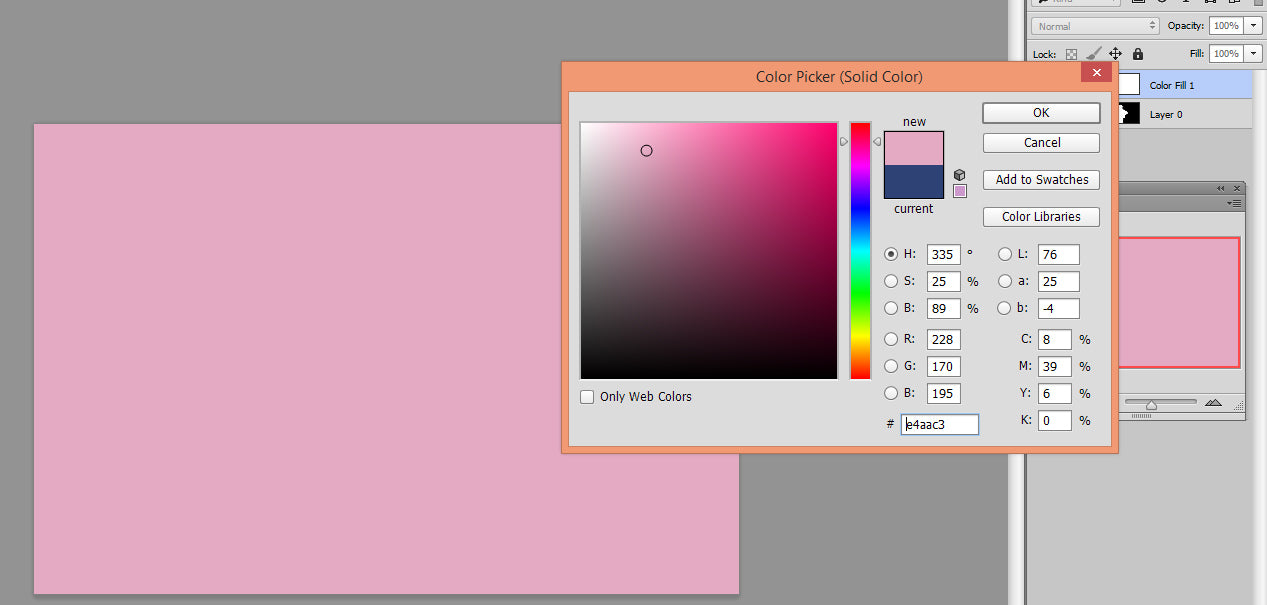
Use the Color Picker to select a color. You can also use the Dropper tool to select a color from your image by hovering over and clicking on where that color is located in your photo.
For example, if I wanted to use a blue that matches her jacket, I could hover my Dropper tool over the blue sections of her jacket to find a color I liked.
However, for this image, I selected a fun, rosy pink color for the background.
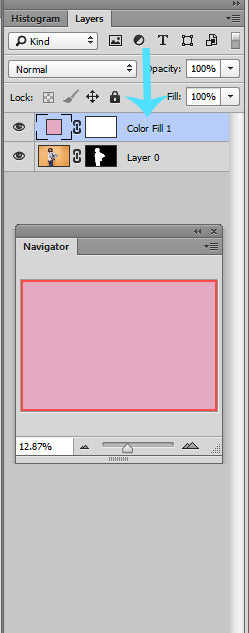
Now, drag your Color Fill Layer beneath your main image layer to make your subject visible above the new background:
But let's take it a step further, and ADD A FEW ADDITIONAL EDITS THAT WILL HELP YOUR SUBJECT REALLY STAND OUT and also make the background look more natural.
When you look at a solid background in a studio, it typically has highlights, midtones, and shadows to it. In other words, it is NOT one solid color but a gradient. We will simulate that color gradient effect by selecting our Elliptical Marquee tool and adjusting the Levels.
First, using the Marquee Tool, draw an elliptical somewhere near the center of your image - it does not have to be exact. In this case, I drew mine a bit higher so that it would be closer to the model's face.
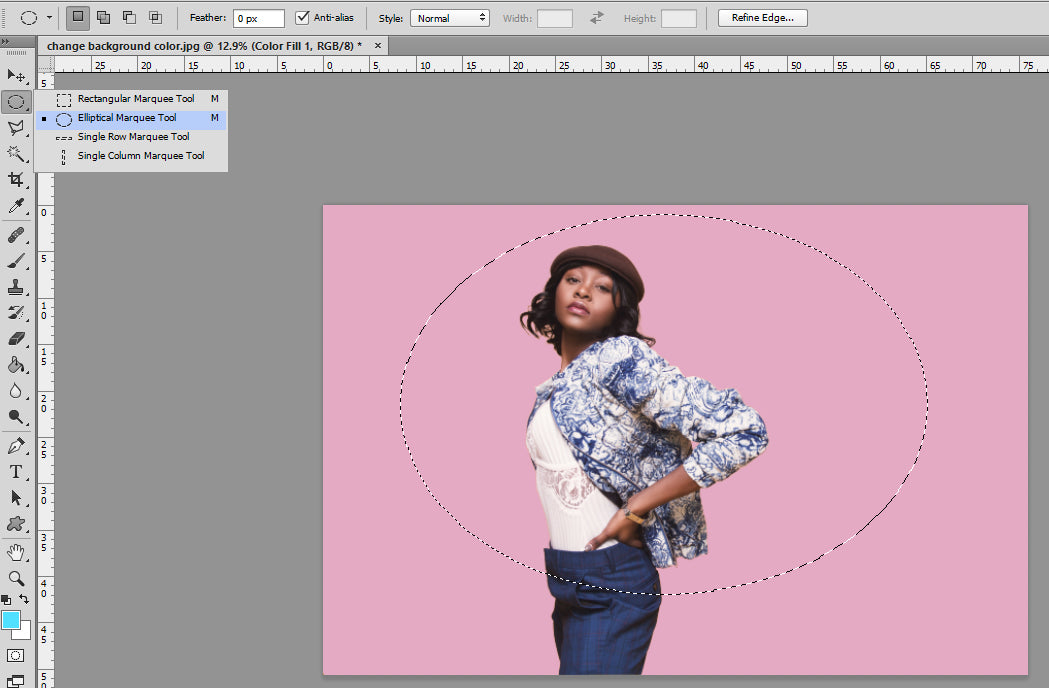
Be sure to right-click, select Feather, and then select 200 pixels to prevent a hard edge on your elliptical selection.
Create a Levels adjustment layer by selecting Layer>New Adjustment Layer> Levels.
Brighten the midtones by sliding the midtones slider to the left. This will create the illusion of a light shining on the background.
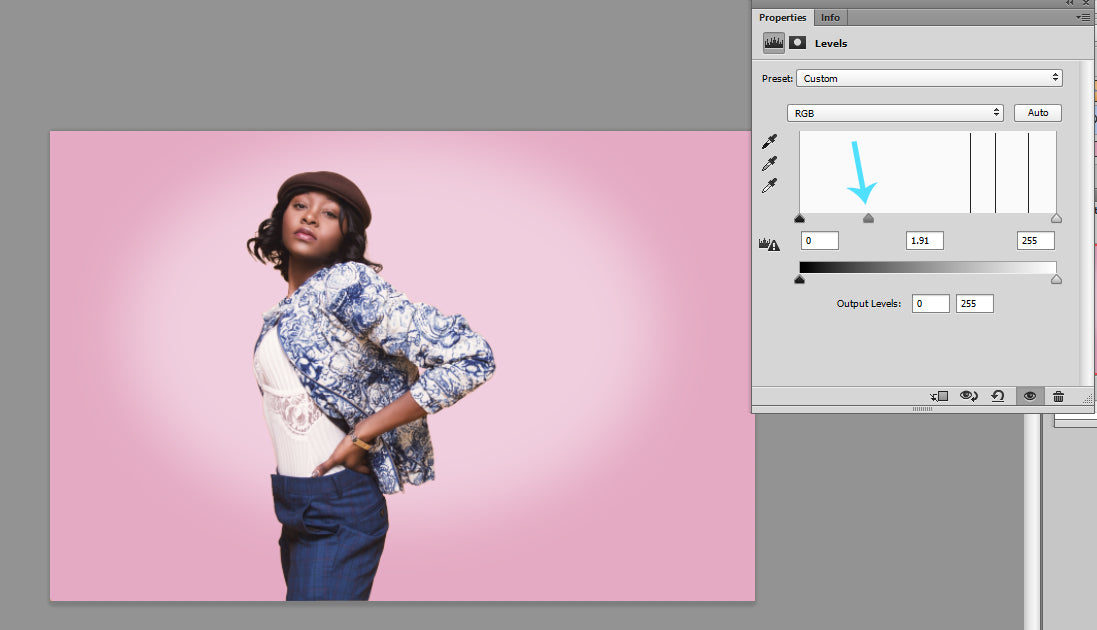
Now, let's darken the edges of our background.
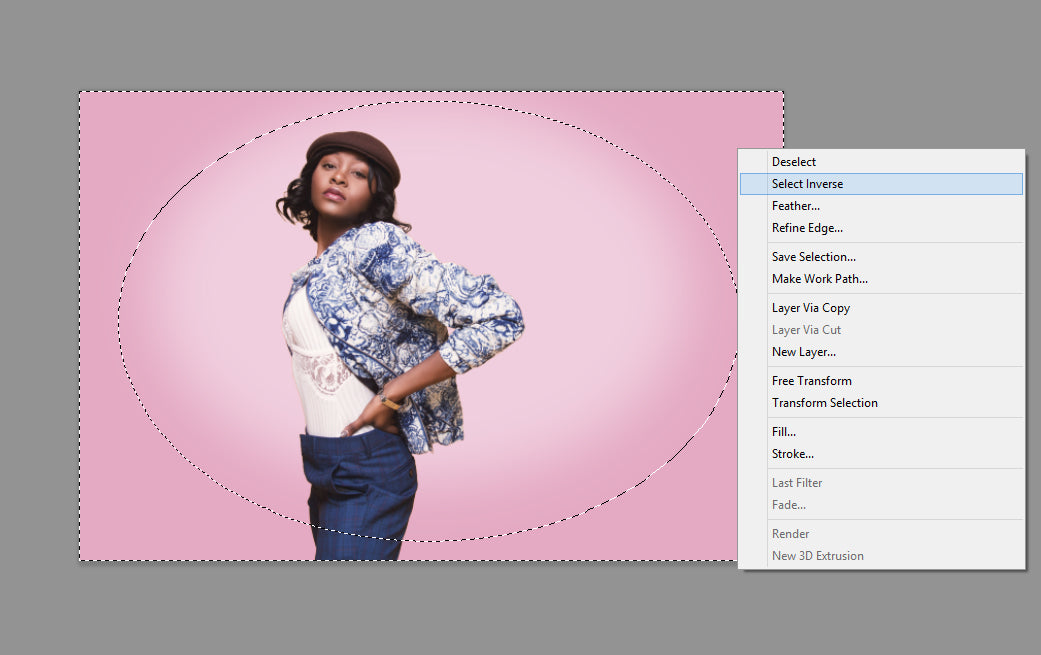
Just as we did in the previous step, create another elliptical marquee selection and right-click to feather at 200 pixels. Now, right-click again and go to Select Inverse - that way, only the outer edges of our image are adjusted.
Create another Levels Layer (Layer>New Adjustment Layer>Levels) and this time, slide the midtones slider to the right to darken the edges of the image.
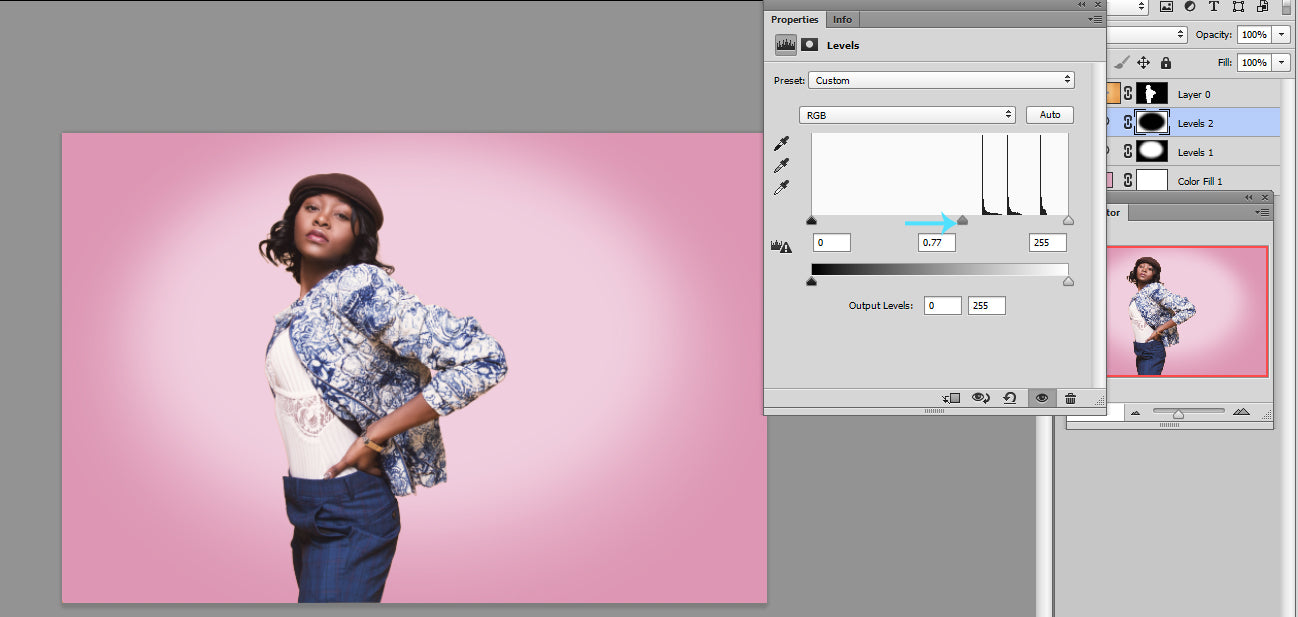
You can continue to tweak each Levels layer by double-clicking the layer until you are satisfied with the results.
In this example, I reduced the brightness of the first layer and made my second layer a bit brighter, so there was more of a smooth transition between the levels.
Here is my final image, including the new background color I selected. I love it!

There you have it. I truly hope you enjoyed this tutorial on changing the background color in Photoshop! Make sure to keep this page bookmarked as a reference until you can remember all these steps on your own.
If you want to REALLY SIMPLIFY THE BACKGROUND COLOR CHANGE PROCESS, Pretty Preset & Actions has a fantastic Magic Color Change Action included in their Pure Color Workflow Collection for Photoshop. I love it and use it all the time!
Do you have any questions or comments about How to Change a Background Color in Photoshop? Leave us a comment below - we would LOVE to hear from you! And PLEASE SHARE this tutorial using the social sharing buttons (we really appreciate it)!


Anna Gay is a portrait photographer based in Athens, GA and the author of the dPS ebook The Art of Self-Portraiture. She also designs actions and textures for Photoshop. When she is not shooting or writing, she enjoys spending time with her husband, and their two cats, Elphie and Fat Cat.

Comments