- Lightroom Presets
- Mobile Presets
-
Photoshop
-
Learn
-
Support
-
Install
- Best Sellers
- Blog
By Cat Granger on | No Comments

There is one little setting that is so very often overlooked in Lightroom and it's a setting that can make editing quicker and easier.
It is so simple to use, yet has made such a big impact on my final images. So, what is this magic button that will make everything brighter and corrects lens distortion?
It is the “Enable Profile Corrections” button located in the Lens correction section of the Develop module.
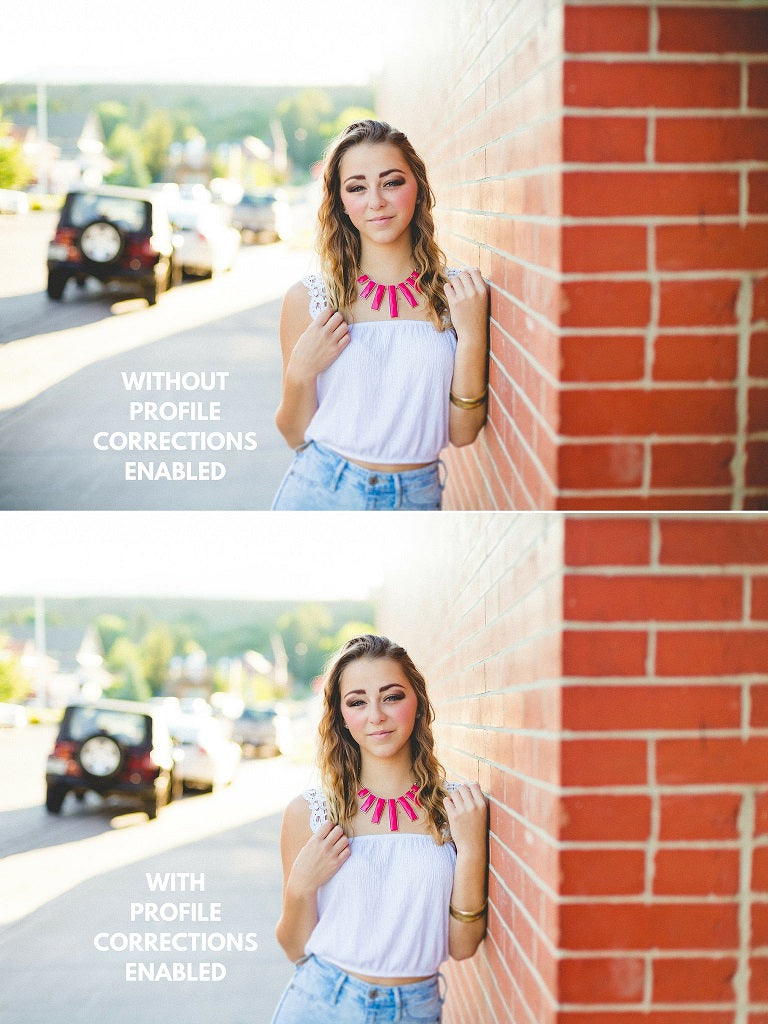
The ONLY difference between the two photos you see below is the enable lens profile corrections button, I promise! See how much brighter the second image is and how the whites look whiter not gray?

Some camera lenses will do weird things to an image. For example, wide angles can make people or buildings lean towards the center of an image. Or, it can stretch subjects wider who are on near the edge of the frame. Some lenses, like my Nikon 60mm f2.8 macro, will put a vignette on the image.
A vignette is an effect that will darken the edges of an image. Sometimes photographers will add a vignette in post processing for a more dramatic look and to put more focus on the subject, however a lens vignette can be way too overpowering and greatly darken the overall image.
When you enable lens profile corrections, Lightroom will make adjustments and correct for any distortion or vignetting that is created by your particular lens. Keep in mind, Adobe Lightroom has a profile for most major lenses. However, not ALL lenses have a profile (one of my older lenses didn't have a profile until just recently).
If you like bright images you may not like the look of a vignette. Look at the image below and see what happens to the dark corners that were caused by a lens vignette before and after I enable profile corrections.
The difference is small, but using the enable profile corrections button will be extra helpful at keeping the background exactly how you saw it through the camera.

Applying Lens Profile Corrections to your image in Lightroom is easy!
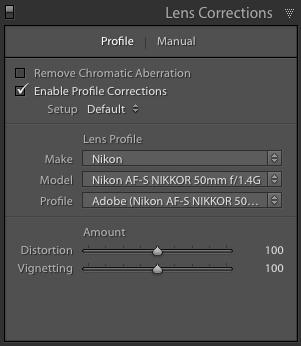
Just navigate to the Develop Module and find the Lens Corrections Panel on the right side. Check the box "Enable Profile Corrections". You will see an immediate change in the image and the lens information will appear below the checked box in the panel.

If you love the look of your images after applying lens profile correction, you can set it as an import preset, so all of your images will import with the changes already applied to it!
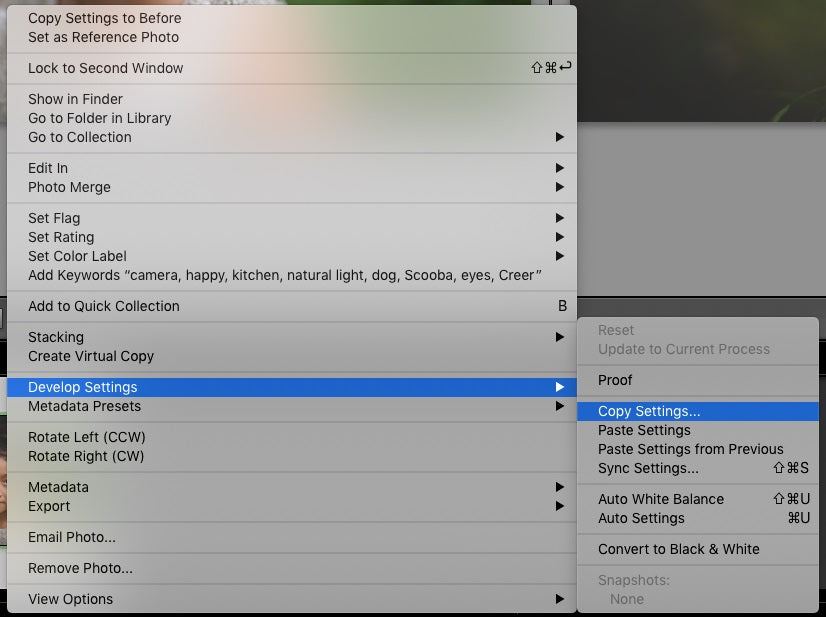
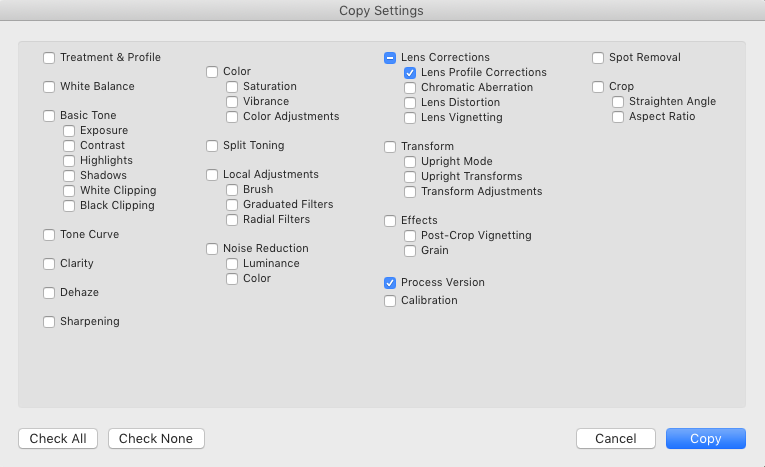
If you don’t want to set up an import preset, you can implement the lens profile correction to multiple images manually, here’s how:


Do you have any questions or comments about Enabling Profile Corrections on your Images? Leave us a comment below - we would LOVE to hear from you! And PLEASE SHARE this post using the social sharing buttons (we really appreciate it)!


Comments