- Lightroom Presets
- Mobile Presets
-
Photoshop
-
Learn
-
Support
-
Install
- Best Sellers
- Blog
By Anna Gay on | No Comments

If you edit in black and white, the Dodge and Burn tools will become two of your favorites! Dodging and burning are traditional darkroom techniques, but the concepts have also carried over to digital editing in Photoshop.
Burning refers to "burning in" tones to darken specific portions of the image to create more definition, while "dodging" is a method to brighten portions of the image. In traditional darkroom printing, you are exposing light-sensitive paper to dim light. By blocking the light from hitting the paper (dodging) you are creating highlights, and by letting extra light hit the paper, you are darkening overall tones (burning). The makers of Photoshop have used this exact concept with their Dodge/Burn tool.
Dodging and burning in Photoshop can be done in color as well as black and white, but they are particularly handy in black and white editing to give your images some added zing.
First, open your image and create a duplicate layer. Then, select your Burn tool in the left tool bar:
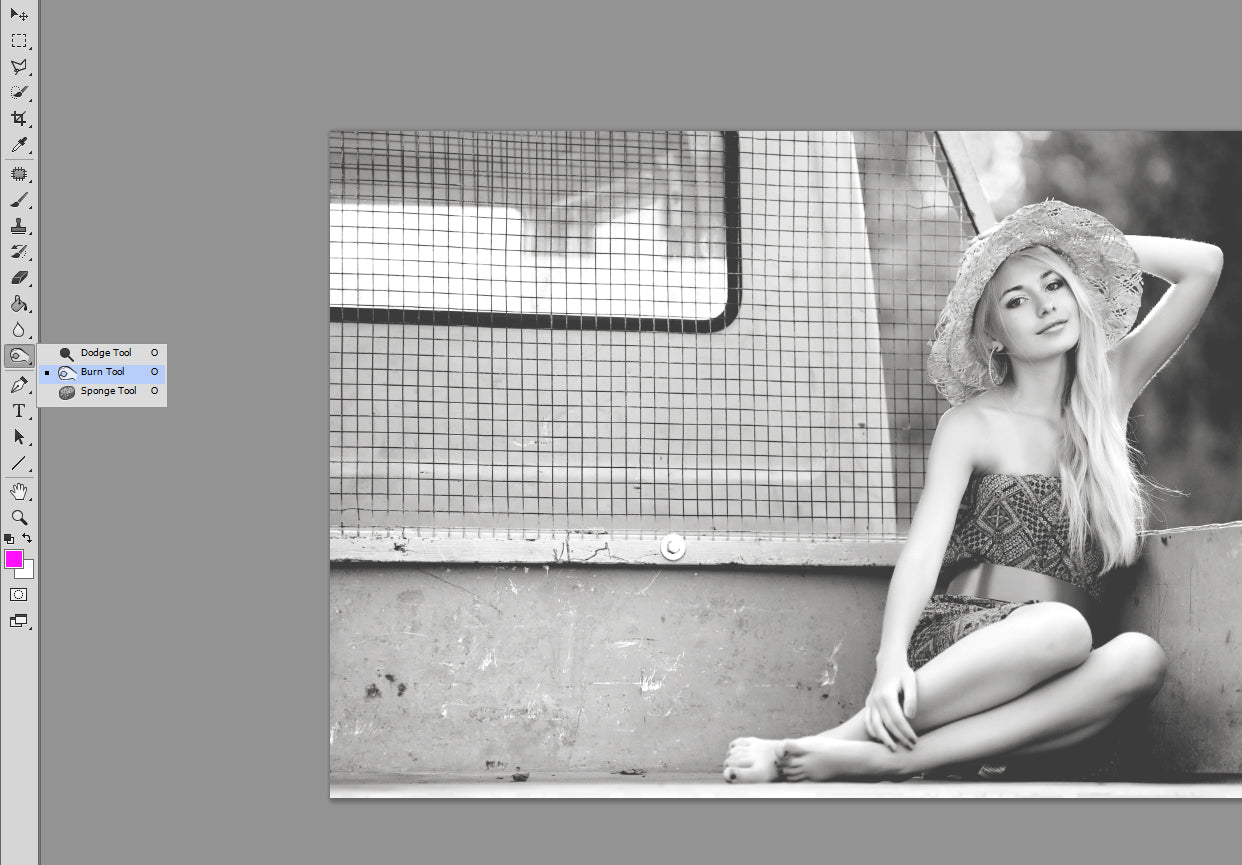
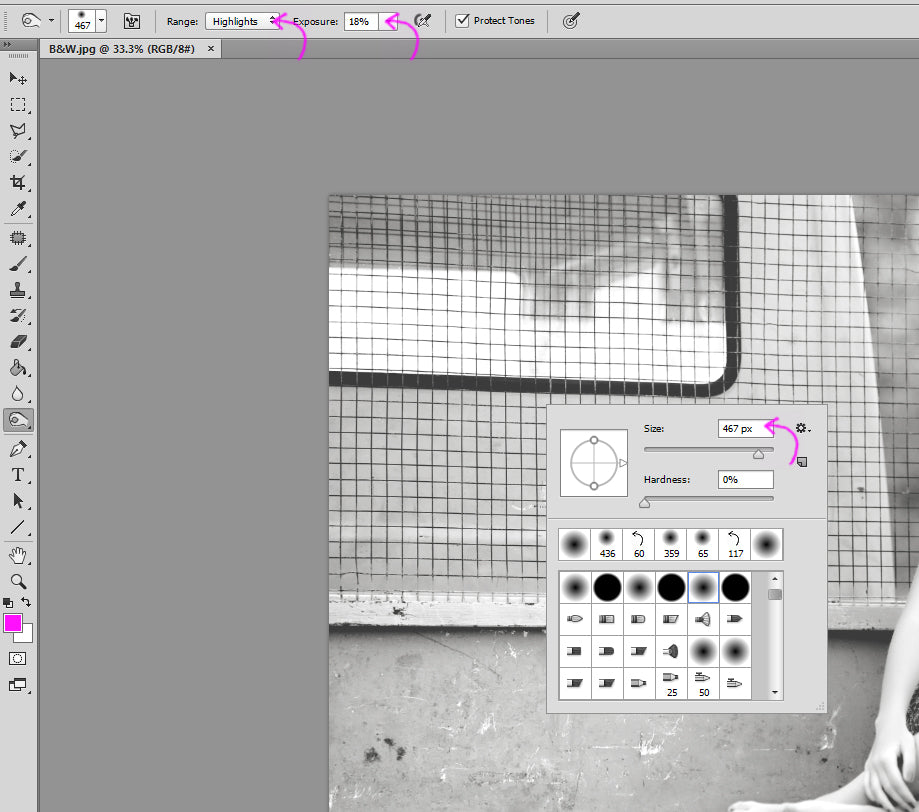
We are going to start by burning the highlights on everything but the subject in the image. This will make her pop and stand out from her surroundings. To do this, set your Range to Highlights and your Exposure to a very low number, in this case, 18%. The best practice with dodging and burning is to start off subtle and build up.
Be sure to select a brush with a soft/blurred edge. Since I am going to be burning a large portion of the image, I have made my brush size large, at 467px.
Left click and hold down on the areas that you wish to burn. If the effect isn't strong enough, you can go over the area again:
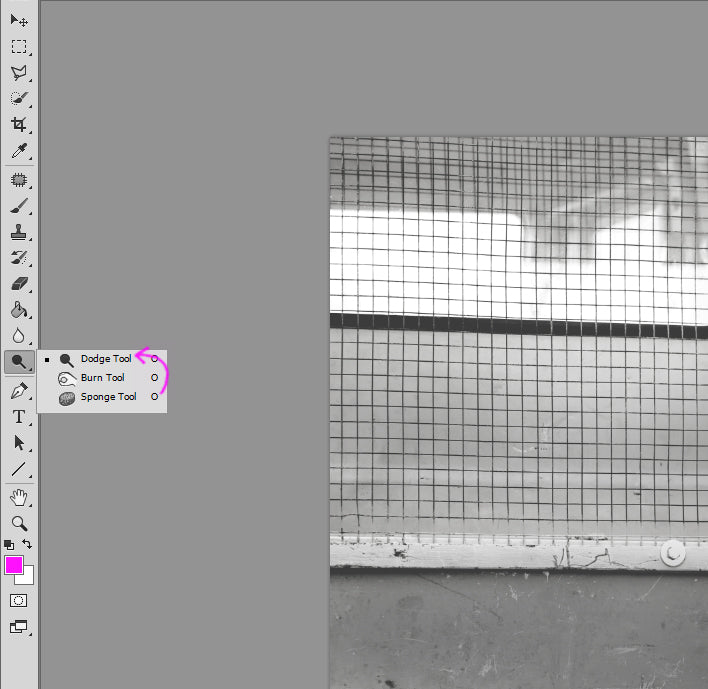
Once the Highlights have been burned, we can begin to focus on making the subject pop by brightening her skin and eyes. For this, we use the Dodge tool:
This time, let's select Midtones as our Range, since our subject's skin falls into midtones, right between shadows and highlights. Again, select a low Exposure value.
In order to brighten her eyes, we would set the Range to Highlights (again, with a very low exposure value) because that will brighten the white (highlights) in her eyes, making them stand out a bit more.
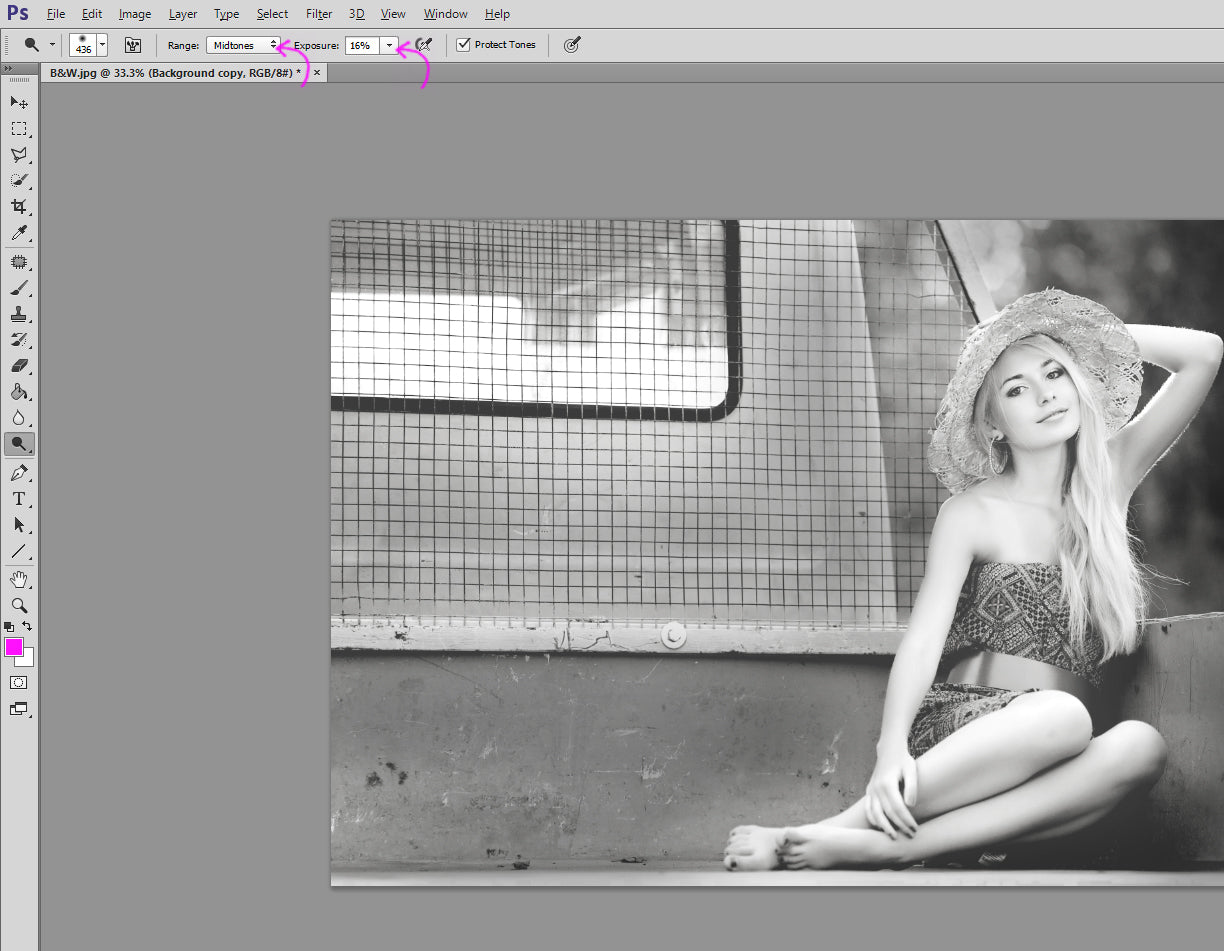
When you have finished dodging and burning, try reducing the overall opacity of your duplicated layer. You will find that this softens your dodging and burning, and can often give you a happy medium between your edited version and the original B&W conversion:
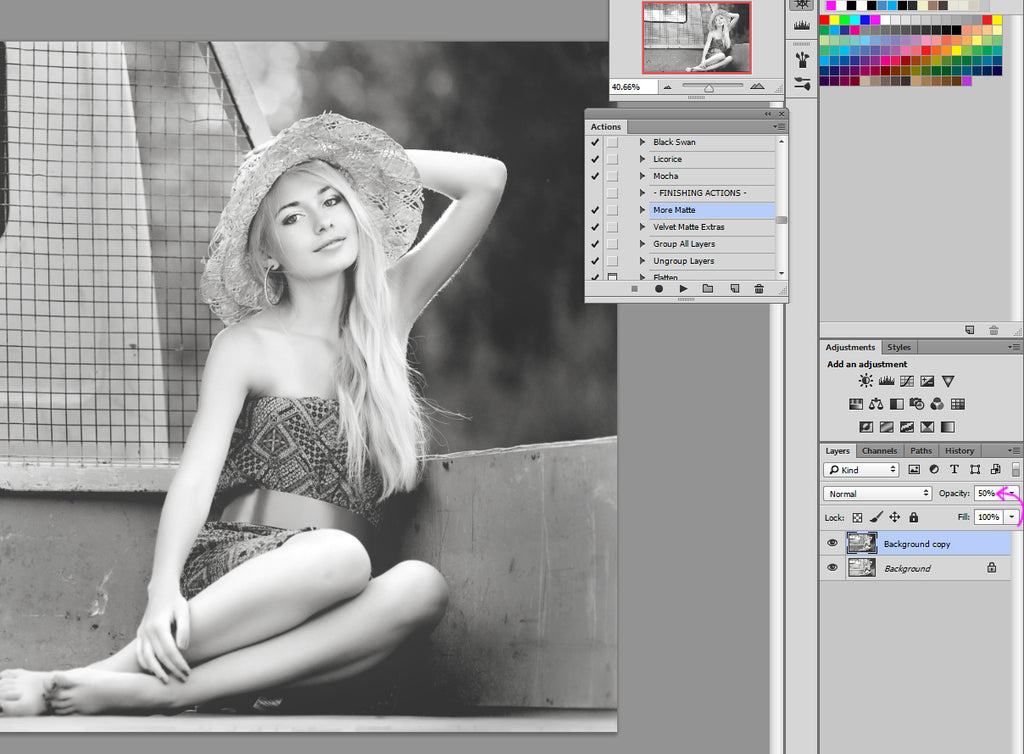
As you can see below in the Before/After example, the effect is subtle, but you can definitely see how much more the subject (especially her eyes!) stand out from the rest of the image.
Like I said, less is more with dodging and burning. When overdone, you will get a muddy and unnatural effect, so always be sure to start slow, build, and try reducing the opacity of your duplicated layer once you have dodged and burned:
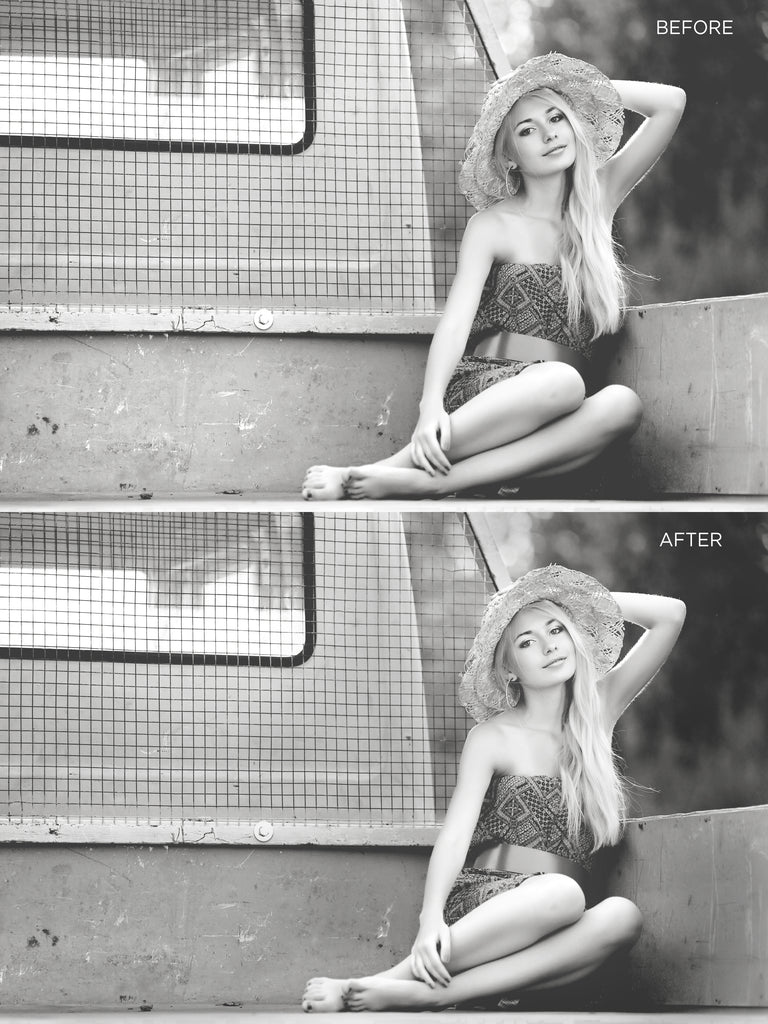
To sum it up:
Also, be sure to check out our Black and White Workflow Collection which features Photoshop actions to help you perfect your black and white images!
Also, be sure to check out all of Pretty Actions other great Photoshop Actions and Overlay Collections!


Anna Gay is a portrait photographer based in Athens, GA and the author of the dPS ebook The Art of Self-Portraiture. She also designs actions and textures for Photoshop. When she is not shooting or writing, she enjoys spending time with her husband, and their two cats, Elphie and Fat Cat.

Comments