- Lightroom Presets
- Mobile Presets
-
Photoshop
-
Learn
-
Support
-
Install
- Best Sellers
- Blog
By Anna Gay on | No Comments

The Levels Panel in Photoshop is a powerful tool that allows you to edit tonal range, as well as color. In this tutorial, we will look at how to use the Levels panel to edit tonal range - highlights, midtones and shadows.
Lets jump right in!
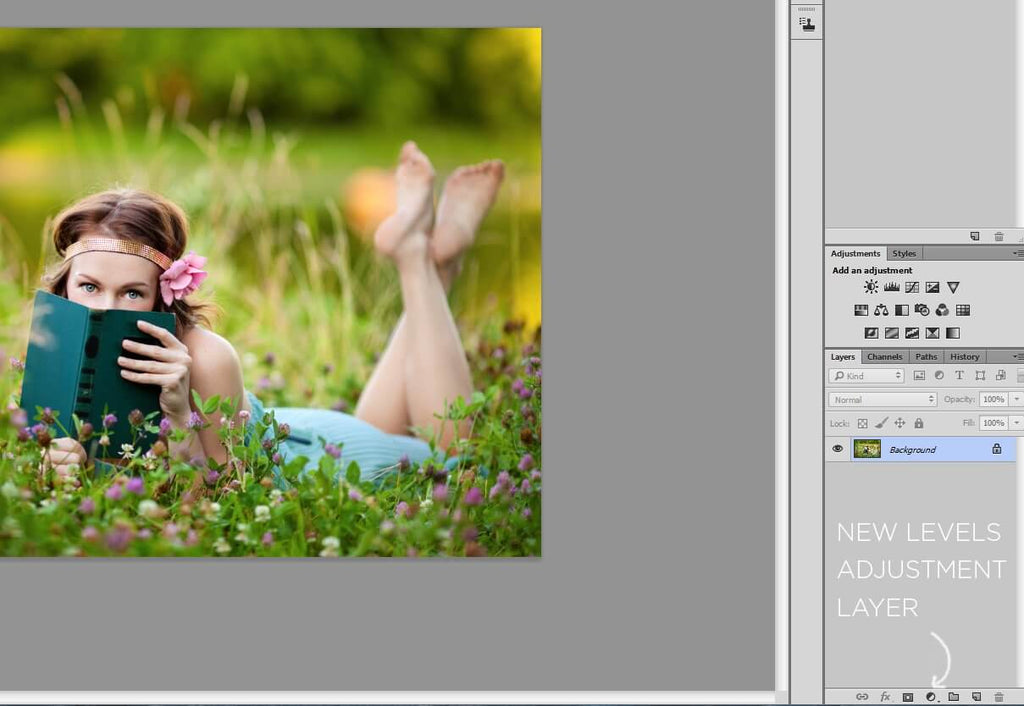
First, create a new Levels adjustment layer:

Once you have created a new adjustment layer, your Levels panel will pop up:

The three triangular sliders represent your Highlights, Midtones and Shadows. Moving your sliders in, towards the center of the histogram, affects how bright the highlights are, and how rich the black point of your image will become. The further you move the sliders into the center of the histogram, the more contrast you will have:

The image above is a rather extreme example of what happens when these sliders are adjusted, but as you can see, moving the sliders towards the center of the histogram created contrast between the highlights and shadows.
As a general rule of thumb, bringing the sliders to just inside the edges of the histogram will boost the tonal range enough to achieve a clean edit on the Levels of an image. Below is an after (top) and before (bottom) of a basic Levels adjustment, along with a screenshot of the Levels panel so you can see the values and the histogram:

The above method is an easy way to manually adjust the Levels in your image, while the Dropper tools are a more "auto" alternative - the dropper tools, however, give you more control than simply running an Auto Levels.

The dropper on top affects your black point (darkest shadows), while the middle and bottom droppers affect your midtones and white point (brightest highlights), respectively.
For the black point, click on a spot in your image that, if printed, should be completely black. Next, use the white point dropper (the bottom dropper) to select the area of your image that represents a portion that should be completely white:

Once you have set your black point and white point, you may find that the effect is too heavy, in which case you can reduce the opacity of the Levels adjustment layer:

Play around with the sliders to see how they behave and how they affect your image, because mastering Levels will help you understand exposure - how to edit it in post-processing, and how to get your exposure right in-camera!
If you are interested in Photoshop actions that will help you beautifully edit Levels for crisp, clean images that pop, be sure to check out our PURE Color Workflow.
Do you have any questions or comments about Photoshop Levels? Just leave us a comment below - we would LOVE to hear from you! And PLEASE SHARE this post using the social sharing buttons (we really appreciate it)!


Anna Gay is a portrait photographer based in Athens, GA and the author of the dPS ebook The Art of Self-Portraiture. She also designs actions and textures for Photoshop. When she is not shooting or writing, she enjoys spending time with her husband, and their two cats, Elphie and Fat Cat.

Comments