- Lightroom Presets
- Mobile Presets
-
Photoshop
-
Learn
-
Support
-
Install
- Best Sellers
- Blog
By Hargun Mujral on | No Comments

Pictures and photography have become an essential tool in everyone’s day to day lives. Professional photography, especially, has high standards when it comes to quality of imagery and flow of colors. With Adobe Photoshop, we can now edit these images to encapsulate the feeling we intend our images to convey.
In this tutorial I will show you how to change the color tone of a selected object in an image in Photoshop, which is particularly useful when changing hair color, or when toning down the vibrancy of an aspect of an image so it isn’t so overpowering.
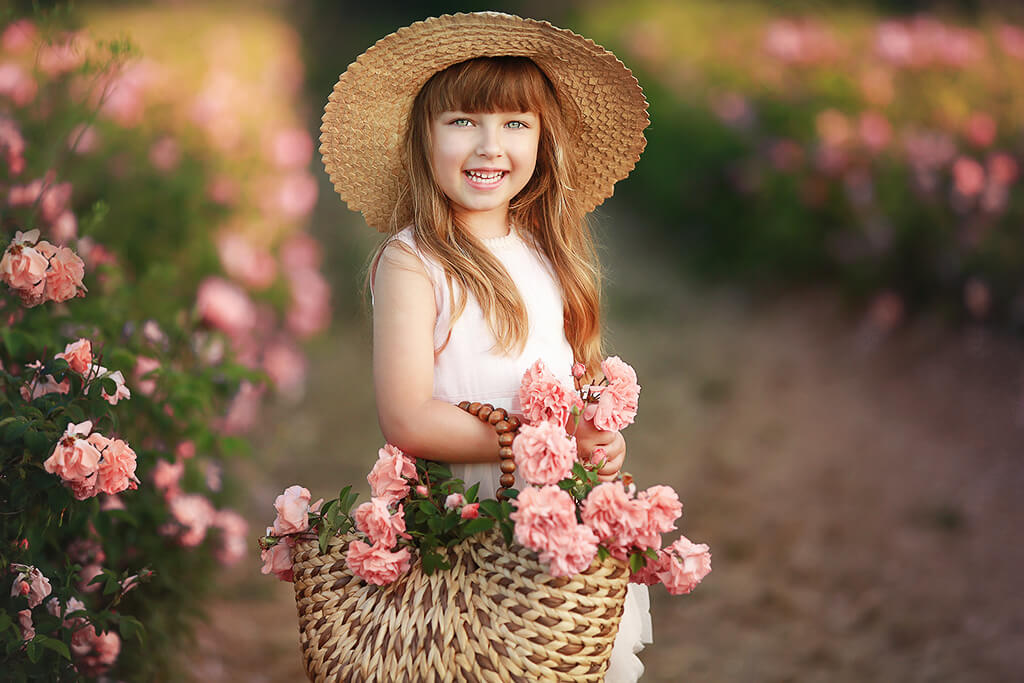
Above is a portrait of a beautiful young girl. Her hair is lovely, but I want to change it to a more red color to make her stand out from the background. And this change is easy to do in Photoshop.
Begin by creating a copy of the image that you are editing by duplicating the layer. That way, if something goes wrong, it’s quick and easy to restart the editing process or replace the focal image. To quickly make a copy, highlight your layer and press Ctrl+J (photoshop keyboard shortcut).

Start with a selection tool. Depending on the scenario (in this case, hair), I like to use either the lasso tool, or the quick selection tool. The former is best when the hair isn’t particularly together, or when it is gelled.

As you can see, the selection isn’t perfect, but it covers most of the hair that we would like to edit, with some extra space. This is perfectly fine, because the selection doesn’t entirely matter from the get-go. We can always fix it later on in our layer mask.

Next, copy and paste your selection, so the hair is on its own layer. You can easily do this by using the same Ctrl+J keyboard shortcut from above. This makes it easier if you need to select the hair again later, so you don’t have to manually lasso it again, and can just select the entire layer. It’s always good practice to name your layers too. In this case, I just named my layer "Hair".

To color the hair, we are going to use a Solid Color/Color Fill layer. To keep the color just on the hair, we are going to select the hair again. You can easily do this by hovering your mouse over the layer thumbnail while holding down the Cmd/Ctrl key. Click once and the selection will appear on your image again.
Now, select Solid Color from the Layer Adjustment Tool at the bottom of the Layers Panel (the circle that is half black and half white).

A new layer will be added with a layer mask showing only the selected hair.

Photoshop will fill the layer with a solid color, which you can then change to the color that you desire. For this image, I wanted a color that was slightly more red. To change the color, double-click on the color swatch in the layer thumbnail and select whatever color you want like from the color picker that opens.

Obviously, the image above doesn't look very realistic at this point. You will need to change the blending mode for the color fill layer from “normal” to “color”. This will nicely blend the previous color scheme of the object with the texture of the hair.
Now that the image looks more realistic, you can change the Fill and Opacity sliders for the color fill layer. This will help blend the color even more with the subject's original hair color. For this image, I set the fill to around 50% and the Opacity to around 80%.
Here is the final image:

And here is a before and after, so you can see the images side by side:

This same process is incredibly useful for a VARIETY OF IMAGE ADJUSTMENTS in Photoshop, like changing the entire hair color of a person, adjusting elements to fit a certain color scheme, or even creating contrast in a boring photo by selecting a certain part of the image and changing its color.
There are many useful tricks in Photoshop to enhance images, but this is one of my favorites and one that I use quite ofent. It’s simple, incredibly versatile, and is a basic step in many more complex processes in Photoshop.
I hope this helps those of you who are new to Photoshop understand how easy it is to edit an image, and change the hair color to help fit with the mood of the picture.
Do you have any questions or comments about How to Change Hair Color in Photoshop? Just leave us a comment below - we would LOVE to hear from you! And PLEASE SHARE this post using the social sharing buttons (we really appreciate it)!


Hargun Murjal is a senior at Burnsville Secondary School, in British Columbia, Canada and the winner of the Pretty Presets & Actions Photoshop Scholarship. He has a passion for graphic design, all things Photoshop and will be pursuing a degree in computer science at a University next year.

Comments