-
Lightroom Presets
- Mobile Presets
-
Photoshop
-
Learn
-
Support
-
Install
- Best Sellers
- Blog
By Jax Nasimok on | No Comments

Bird photography has a unique set of challenges on top of basic things like exposure and focus. You have to deal with weather problems like frostbite and heat distortion. Other hazards include ticks, mosquitoes, biting flies, fire ants, poisonous plants, thorns, and many more.
If that’s not distracting enough, you now have to go and track down your avian subjects - subjects that, in most cases, won’t cooperate at all.
You need patience and skill to know how that bird will act and place yourself in the best position to photograph them. However, there is a silver lining; once you've captured some bird images, Lightroom can help turn many of those "so-so" photos into fantastic ones.
To help you do that, I have compiled my top tips for editing bird photos in Lightroom:
My favorite time to photograph birds is during overcast conditions. However, when photographing birds in cloudy weather, you have to deal with grey skies that can often dull the color of the surrounding landscape - in this case, the lake water in the background.
Luckily, Lightroom can fix this by adding back missing color using some simple temperature adjustments.
Let’s look at this bland image of a Purple Sandpiper with only a saturation adjustment applied:

Purple Sandpiper - only saturation edit applied
First, I am going to click the Masks tool in the toolbar. This tool is on the far right of the toolbar and is denoted by a circle with a dotted outline. From the options that open, choose "Brush."
Now, with the brush tool open, I brushed over the entire water portion of my image. Then, from the mask adjustment options on the right, I decreased the temperature slider (in this case, I used -14) to help add back some of those nice blues that should be in the water.

Next, I use a new brush to brush over the rest of the image. This time I increased the temperature slider (in this case, I used +5). I also increased the saturation slider (in this case, +18) and the highlights slider (in this case, +20).
Finally, I made some basic exposure and contrast adjustments to complete the edit:

Purple Sandpiper – Temperature, saturation, contrast, and highlights edits applied
If I had only made a saturation adjustment, I would have never gotten the wonderful rich blues, as shown in the image above. In real life, these colors only become apparent with a bit of sun, so I mimicked this in Lightroom by warming up the rest of the image and boosting the highlights and contrast.
This technique can be used on images with cloudy skies and, if the adjustments are subtle, on woodland images too.
The brush tool is my most frequently used tool outside of the basic panel, and it can be a somewhat tedious process to select the areas you want to work on. Since birds have intricate shapes, it can sometimes take a long time to select them by hand.
To help with that, I’ve learned two quick ways to increase efficiency and accuracy and to help speed up processing a large batch of images.
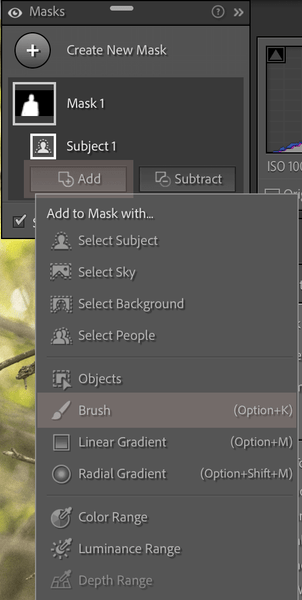
First, I use the new AI tools available in the Masks Panel. This will remove some of the control from your hand, but this tool can help speed up selecting particular areas of your photo.
For birds and other wildlife, I often use the "Subject" mask or the "Object" mask. Both options are available by clicking the Masks icon (the circle with a dotted outline) in the tool panel just above the basic panel.

When using the "Subject" option, Lightroom will guess what the "subject" of the photo is and create a mask of the subject. Depending on the shot, sometimes Lightroom selects the subject perfectly, and sometimes the selection needs a bit of refining.
The "Object" option allows you to brush over any object in your image, and Lightroom will detect the object and the edges. When brushing over the object, you don't need to be exact. The brushing just helps Lightroom to know which "object" to target.
Then if needed, I use the "Add" and "Subtract" buttons to help refine the selection (if the AI tool doesn't get it quite right). I find it easiest to "Add" or "Subtract" with a small brush.

Once the subject is selected using the AI Masking Tools in Lightroom, you can make any edits you need to that area.
Go ahead and try out the great AI tools in Lightroom. I think you'll be impressed!

Purple Sandpiper Screenshot – Brush tool set to maximum exposure for easy viewing
With fast-moving birds, there is often little time to readjust, resulting in frequent captures that include blurry twigs or branches in the corners of your image.
Other times, you can’t get close enough to the bird you're trying to photograph. If you’re shooting at 500 or 600mm at a distance of 20 meters or more, getting a clean, clutter-free background is very difficult.
In these cases, the clone stamp and a clarity adjustment will save your images time and time again.
For example, Let's l start with an out-of-focus twig that's getting in the way of an otherwise beautiful image.
For example, in the image below, an out-of-focus twig is getting in the way of this otherwise beautiful photo.

For this type of situation, I start with the clone stamp tool. Setting the opacity of the clone stamp tool to 90 and feathering to around 50 seems to work the best for blending in most edits.
Sometimes this doesn’t quite work, and you will see a harsh line between the edited and unedited parts of the image. When this happens, I use the brush tool with a clarity adjustment to smooth out the edit within a small area.

Eastern Phoebe Screenshot – Clone Stamp
When dealing with a cluttered background (which often happens when shooting from a distance), I find using the opposite method works best.
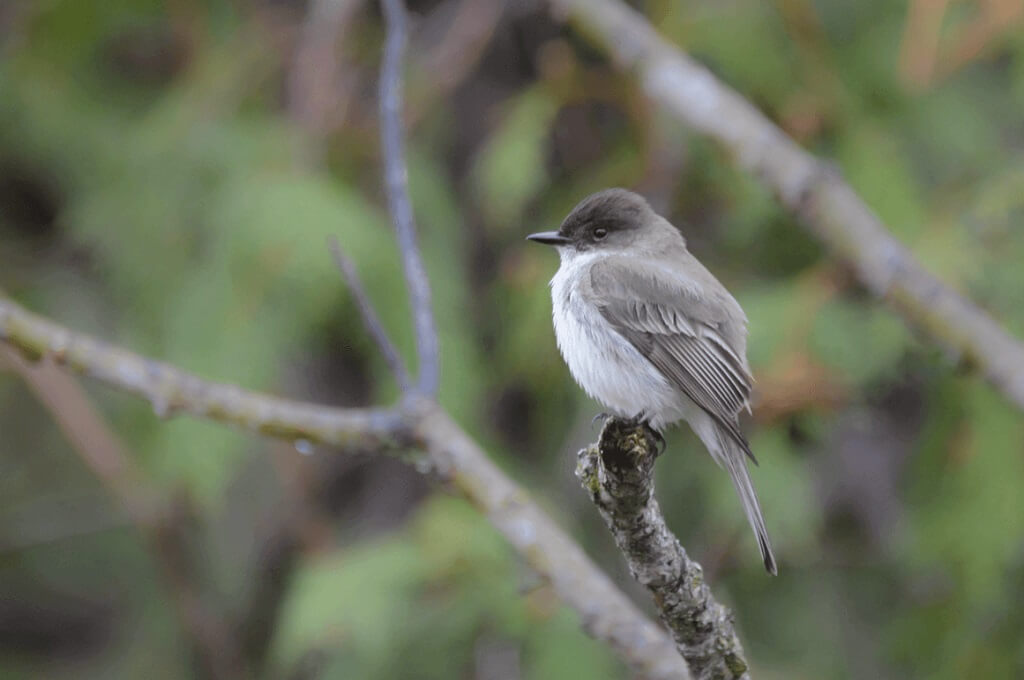
To do that, I use the AI mask titled "Background" or the brush tool to select the entire image except for the bird and its perch. Then I reduce the clarity of that selection (somewhere between -40 and -80 generally works best). For this particular image, I used -72.

Eastern Phoebe Screenshot – Selected area for clarity adjustment (I increased the exposure to make viewing easier)
Occasionally some areas of the photo will look a bit off when a drastic adjustment of clarity is applied, but the clone stamp tool can help smooth out those troublesome areas.
When you can't get very close to a bird when shooting but still want the background to look a bit more distant and blurred, this is a great technique to use in Lightroom.

Eastern Phoebe – Clarity and clone stamp edits applied
Brightening the catch light and darkening the rest of the bird's eye can bring a bird to life, especially if it was taken on a cloudy day. This is a quick fix, but it can really improve a bird photo.
Here is my original image:

Winter Wren screenshot – unedited eye
Two quick selections and adjustments with the Lightroom brush are all it takes.

Winter Wren Screenshot – Edited Eye
In conclusion, mastering the art of editing bird photos in Lightroom can significantly enhance your images' overall quality and impact. By applying the proper techniques and tools, such as adjusting exposure, enhancing colors, and removing distractions, you can transform your bird photographs into stunning visual representations of these magnificent creatures.
These techniques have saved or improved hundreds of my images and will enhance your bird photography too! So, grab your camera, capture those feathered beauties, and let Lightroom help you bring them to life!
Do you have any questions or comments about Editing Bird Photos in Lightroom? Let us know in the comments below - we would LOVE to hear from you! And PLEASE SHARE our tutorial using the social sharing buttons (we really appreciate it)!


Jax is currently studying Conservation Biology at Trent University and enjoys hiking, birding, and photography. He is active with citizen science, acting as a reviewer for eBird and as a principal atlasser for the Third Ontario Breeding Bird Atlas. He also works with the Piping Plover project in the Ontario Parks South East zone.

Comments