- Lightroom Presets
- Mobile Presets
-
Photoshop
-
Learn
-
Support
-
Install
- Best Sellers
- Blog
By Anna Gay on | No Comments

Did you know that you can export directly from Lightroom to the web, and to popular sites such as Facebook?
Last week, I noticed that, when uploading images to Facebook, some of my images just did not look good once they were uploaded. Some of them were over-sharpened, while others looked like a pixelated disaster.
Needless to say, I was pretty embarrassed by how bad my uploads were looking, so I did some research to figure out how in the world to fix this problem. Here are the best ways to make your images look great on Facebook:
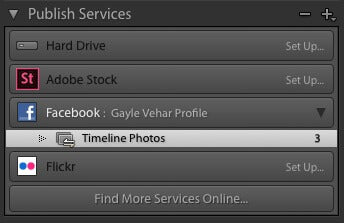
On the left-hand side of Lightroom, you’ll see under Publish Services there is a tab for Facebook. Click the Facebook tab, and follow the prompts to link Lightroom to your Facebook account.


Under File Settings, set your image format to JPEG, Quality between 80-100.
Image Sizing: check Resize to Fit, select Long Edge, then enter 2048, making sure the dimensions are in pixels.
Output Sharpening: Check Sharpen for Screen, Amount: Standard
Watermarking: If you'd like to include a watermark you have saved in Lightroom, check the box next to Watermark and then choose your desired watermark from the drop down menu
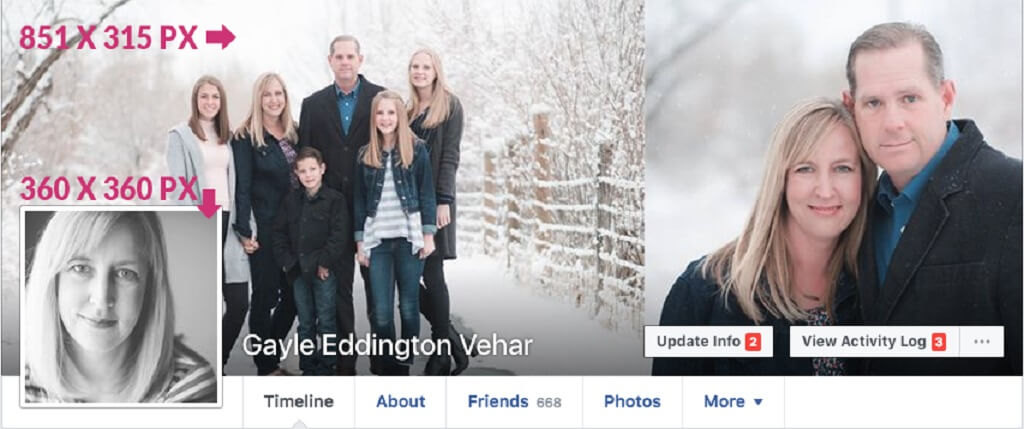
For cover photos, use all of the same settings mentioned above, except for the image size. For best results you will need to size it to 851 X 315 pixels.

Again, use all of the same settings mentioned above, except for the image size. For best results, your profile image should be uploaded at 360 x 360 pixels. The minimum dimensions for a profile picture are 180 X 180 pixels.
PLEASE NOTE: These dimensions are for desktop or laptop viewing. If you are viewing Facebook on a mobile device, your header images will be cropped strangely at the sizes mentioned above.
The best size to upload for mobile devices is 1920 x 1080. But again, if you upload an image at these dimensions it will crop differently for desktop viewing. The only way around this is to size for mobile but make sure that no heads or important parts of the image are anywhere near the top or bottom.
Hopefully these tips will be helpful to you in sizing your Facebook images! The images you display on your Facebook business page are extremely important, as this is likely the way a lot of people are finding your business. So, make sure you are displaying the highest quality images you can!
If you are looking for a tutorial on general image resizing in Lightroom we have a great one. Just click the link.
Do you have any questions or comments about Resizing for Facebook in Lightroom? Leave us a comment below - We would LOVE to hear from you! And PLEASE SHARE this post using the social sharing buttons (We really appreciate it)!


Anna Gay is a portrait photographer based in Athens, GA and the author of the dPS ebook The Art of Self-Portraiture. She also designs actions and textures for Photoshop. When she is not shooting or writing, she enjoys spending time with her husband, and their two cats, Elphie and Fat Cat.

Comments