- Lightroom Presets
- Mobile Presets
-
Photoshop
-
Learn
-
Support
-
Install
- Best Sellers
- Blog
By Gayle Vehar on | No Comments

Lightroom's brush tool, radial gradient and linear gradient masks are the perfect way to add a certain effect to a specific area of a photo.
When I want to make a change to a small area of a photo, I use the brush tool. Brushes are applied on very specific areas of you photo -- wherever you brush!
And when I want to make a change to a larger area of a photo (but not the ENTIRE photo), I choose either the linear gradient or radial gradient. Radial gradients are circular filters. Linear gradients are applied in straight lines.
The brush and filter masking tools are located on the right side of the Develop Module just under the Histogram.

Lightroom comes with a FEW default brushes and filters that you can apply to your photos, however you will have a LOT MORE OPTIONS once you purchase and install any of the Pretty Preset brushes that are included with many of their preset collections. Once you have the brushes or filters installed they will be accessible through these tools.
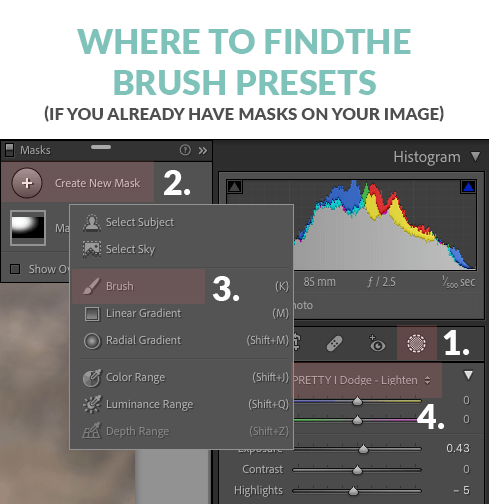

To use a brush preset, click on the circular icon just below the histogram in the Develop Module. Then choose either the brush, linear gradient, or radial gradient options. Next, click on the words (and double arrow) next to the word "Effect" from the panel of sliders that appears. A list of the brushes or filters you installed will pop up and you can choose the one you want. The linear and radial gradient tools are accessed the same way.
The radial gradient, linear gradient, and brush tools have almost all the same settings and a very similar look. Also keep in mind that you can use the brush effects from the Perfect Portrait Brushes as linear or radial gradients.
You can apply multiple brushes or filters to the same photo. It's simple. All you need to do is click the word "Create New Mask" and then choose the type of mask you want to add next. These can overlap other mask effects you have applied or be completely separate.
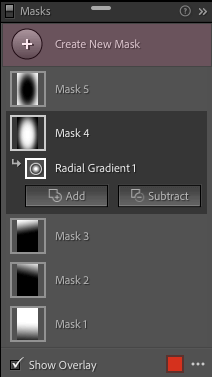
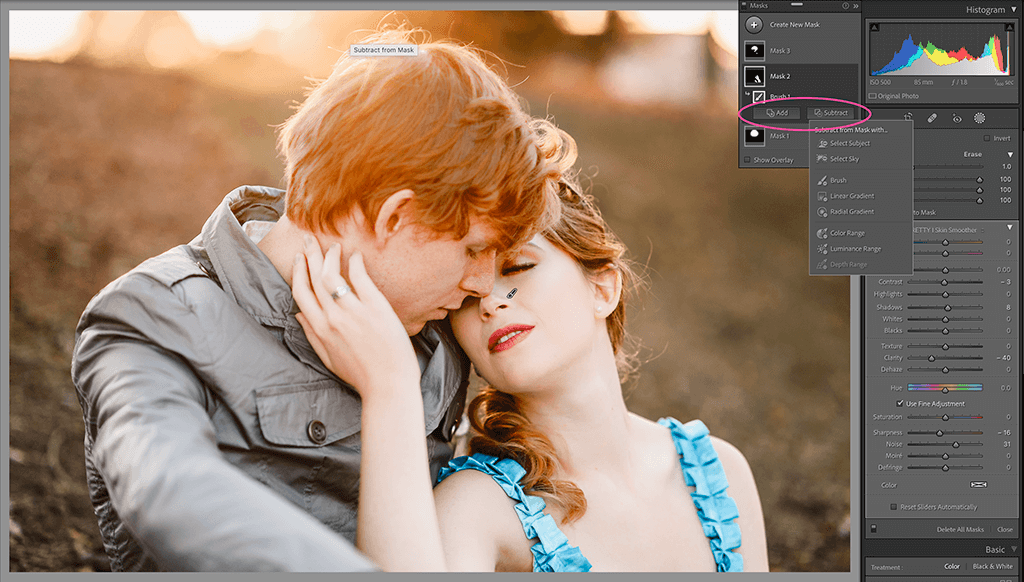
In the most recent version of Lightroom Classic, Adobe added the ability to "Add" or "Subtract" from any of the masks you apply such as the linear gradient, radial gradient or brush. This new tool allows you to remove or add to the effect you applied with one of these filters using ANY of the mask tools available. This new feature adds a whole new dimension to these tools and means they can be customized even more than they could previously.
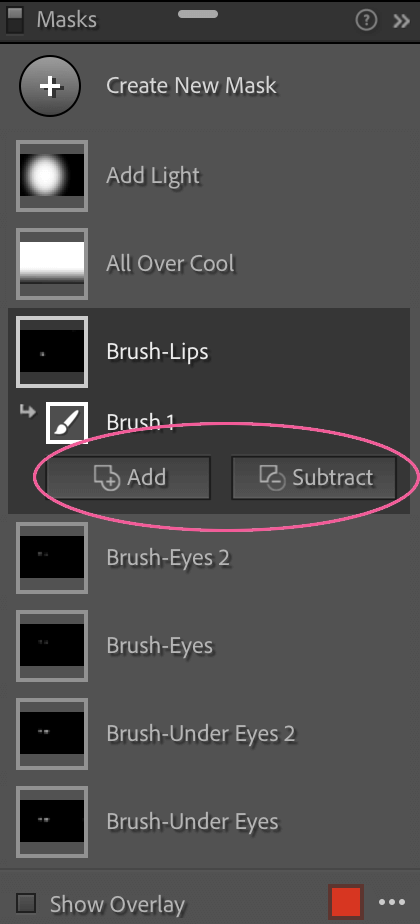
To find the Add or Subtract feature, you will have to first click on the Masks icon in the tools section just below the Histogram (the circle with a dotted outline).
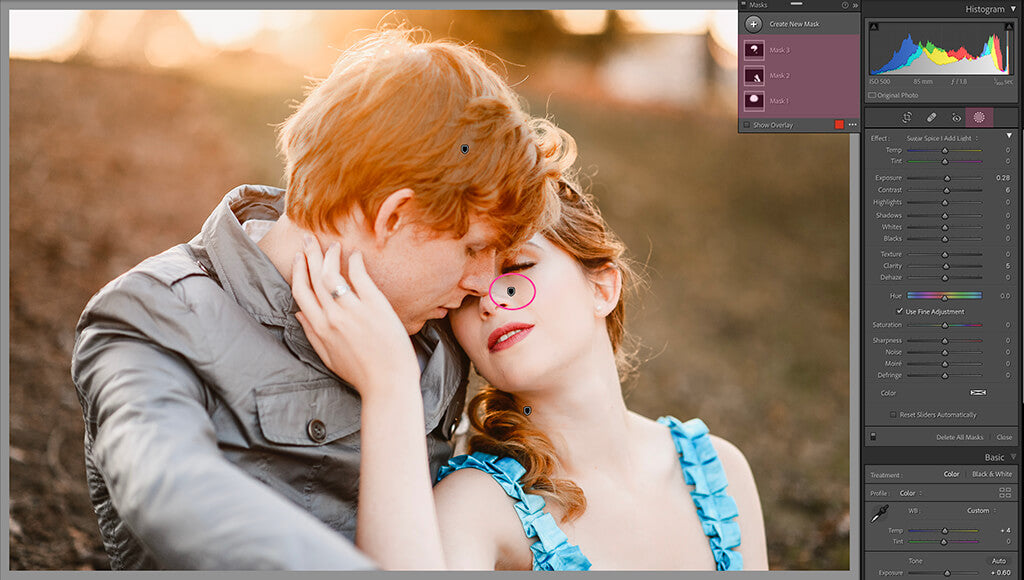
Activate any of the Masks by clicking on the large black and white box showing the masks in the masks panel. You could also click on the specific pin on your image.
Once you have the mask layer you want to adjust selected, you'll see an "Add" or "Subtract" button appear. To erase part of the effect choose "Subtract". To add to the effect choose "Add".
A new box will open, similar to the box that appears when you click "Create New Mask" and this will allow you to choose HOW you want to add or subtract the effect from your image. Often the easiest choice will be brush but all the options are available. Once you have chosen the option you like, move over to your image and add or subtract the effect.
There are times when you will definitely want to utilize the mask overlay when using brush and gradients. The mask overlay shows all the areas where the effect you have added is being applied to your image. This can be very helpful since without this visual it would be difficult to know exactly where you have brushed or erased.
To see the overlay while you are working, type the "O" key on your keyboard or check "Show Overlay" at the bottom of the Masks Panel. The overlay automatically will show as red, but realize that this color isn't actually ON your image and you can change the color using the color box to the right of the "Show Overlay" checkbox.

If you are more of a visual learner, make sure to watch the videos below where we show you exactly how to use these tools to edit your photos in Lightroom:




Hi!! I am Gayle. I am a wife to my handsome husband and mom to 4 beautiful kids. In my spare time, I am a photographer and blogger at Mom and Camera. I have a passion for sharing my love of photography with others. I teach local photography classes and regularly share photography tips and tricks on my blog. I hang out there a lot—I’d love you to stop by and visit!

Comments