- Lightroom Presets
- Mobile Presets
-
Photoshop
-
Learn
-
Support
-
Install
- Best Sellers
- Blog
By Gayle Vehar on | No Comments

Lightroom has lots of settings and preferences -- and sometimes its hard to know what the best option is!
So, today I thought I would share with you 3 Lightroom settings you can change RIGHT NOW that will make your life in Lightroom MUCH EASIER!
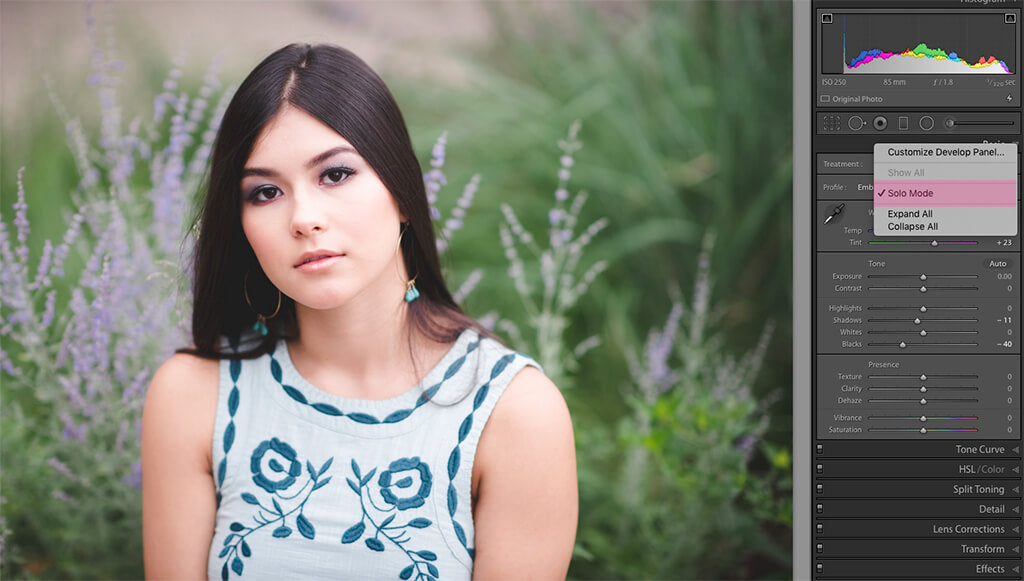
Change your panels to Solo Mode! If you are editing on a small screen and haven’t made this change already, you will thank me for showing you this. Simply right-click next to any of the panel titles (ex. Basic, Tone Curve, etc). In the box that opens, choose "Solo Mode". It should have a check by it's name if it is activated.
By changing your panels to Solo Mode, only one panel will be open at a time. When you open the Effects Panel, the Basic Panel will close. When you open the Tone Curve Panel, the Effects Panel will close.
This means no more scrolling and scrolling through all your open panels just to find the one you need. If you are using Lightroom on a laptop, this is even more of a lifesaver.

If Adobe were being perfectly clear and straight forward, they would have called this setting Auto-Save.
This setting isn’t really a lifesaver as much as it is a work and sanity saver. It doesn't matter if you shoot in JPEG or RAW, Lightroom saves the changes that you make to your file in your Lightroom Catalog. However, those changes WON'T get saved to the photo file until/unless you tell Lightroom to do it.
By making sure to check the “Automatically write changes into XMP” box you are telling Lightroom to also save the changes with the file and not just in the catalog.
That way, if your Lightroom catalog ever becomes corrupted, all your edits and changes will still be with the photo file and can be read by Lightroom and/or Photoshop.

If none of this makes sense, just follow these steps anyway. I promise you won’t regret it.
For Windows Users: Go to Edit>Catalog Settings>Metadata (tab) to find the check box above.The external editing preference will set how Lightroom interacts with other editing programs.
Set the File Format to either PSD or TIFF. I keep my Color Space set to ProPhoto and my Bit Depth to 16. You will want to set the resolution to 240 or higher.

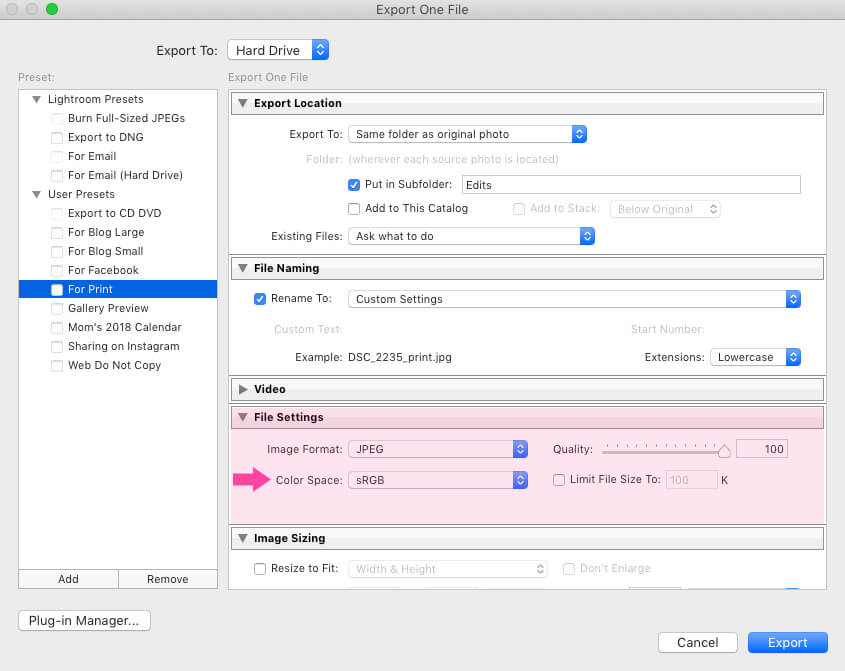
Since we want to edit as long as possible with the ProPhoto Color Space and 16 bits, you will want to make sure that when you export your final photos from Lightroom that you export in the sRGB color space, which is the standard for sharing images on the web and printing at a photo lab.

Do you have any questions or comments about these 3 Lightroom Settings to Change Right Now? Leave us a comment below - we would LOVE to hear from you! And PLEASE SHARE this post using the social sharing buttons (we really appreciate it)!


Hi!! I am Gayle. I am a wife to my handsome husband and mom to 4 beautiful kids. In my spare time, I am a photographer and blogger at Mom and Camera. I have a passion for sharing my love of photography with others. I teach local photography classes and regularly share photography tips and tricks on my blog. I hang out there a lot—I’d love you to stop by and visit!

Comments