- Lightroom Presets
- Mobile Presets
-
Photoshop
-
Learn
-
Support
-
Install
- Best Sellers
- Blog
By Gayle Vehar on | No Comments

The Lightroom spot healing tool saved my life!
Well it didn't LITERALLY save my life (as in bring-me-back-from-the-dead kind of save my life). But it did save me TONS of time as I was able to quickly remove one LARGE dust spot from all my photos that I had taken over a period of 3 MONTHS (that's right--I totally just typed 3 MONTHS)!!
And, YES, I am a little embarrassed to admit that to you!
You might think this sounds like a time consuming process, but let me assure you that Lightroom makes removing things like dust spot from your images very easy. Easy enough that I let it go for 3 MONTHS (did I already say that?!?!)
To find out more, you can watch this video and continue reading the tutorial below!
Here are the written steps to remove dust spots in Lightroom:
You will find the Spot Removal Tool in the Develop Module in the right-hand panel underneath the histogram.
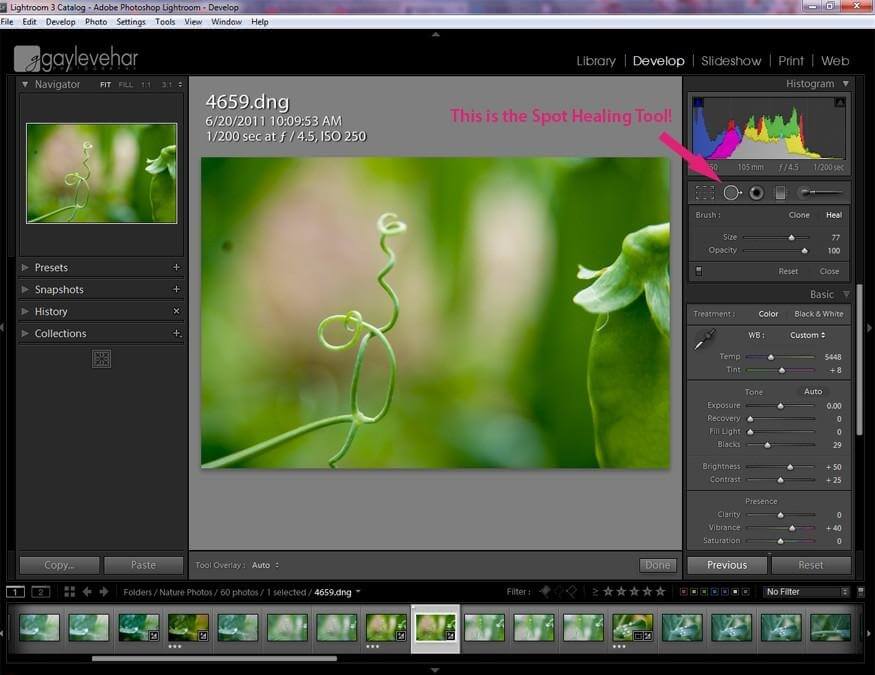
When you click on the Spot Removal Tool a little box will open that gives you some options.
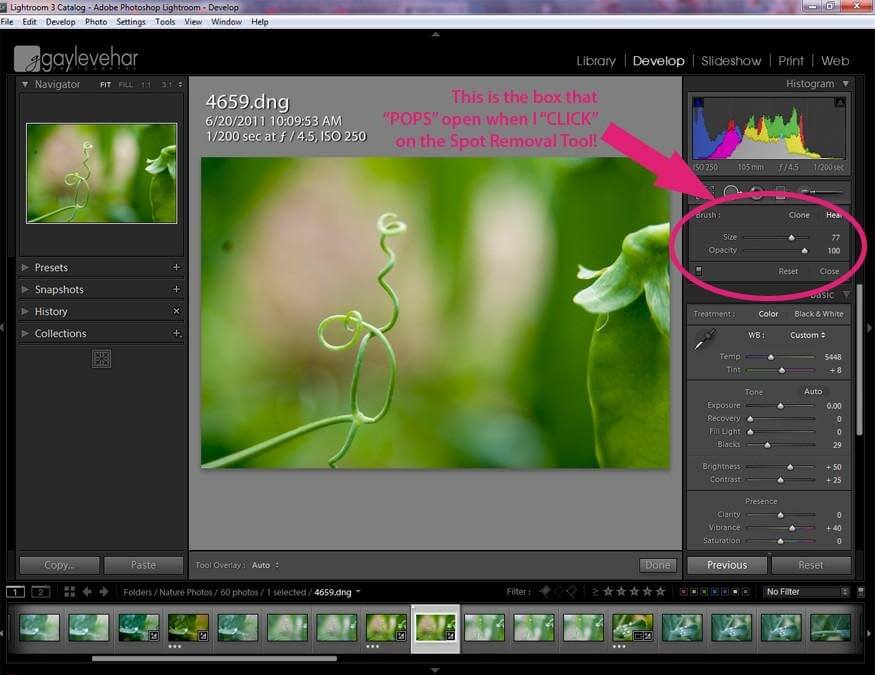
First, you need to choose whether you want to use the Clone Tool or the Heal Tool. I have found that they each work great depending on the type of photo and the spot you are trying to remove.
Sometimes Clone works better and sometimes Heal works better. You will have to experiment with your spot to figure out what works best. For this photo, the Heal tool worked better.
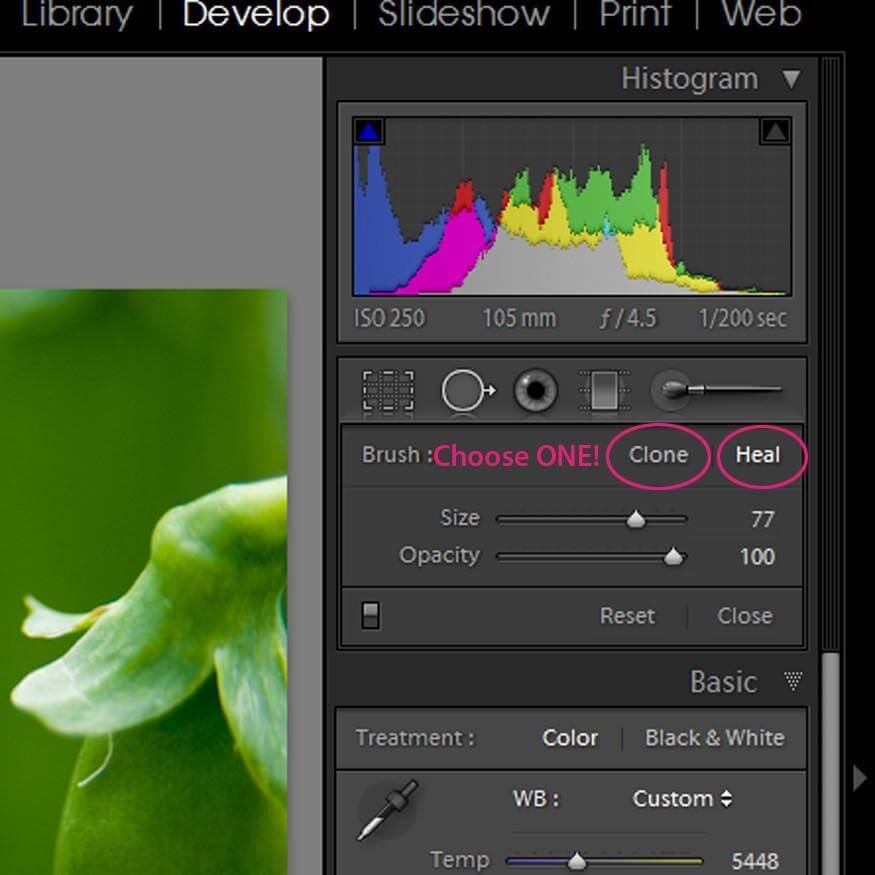
Next, you need to size the brush. You can use the slider in the panel that opened up or you can use your right and left bracket keys to do this (tip: you can use this same Lightroom keyboard shortcut to resize your brushes in Photoshop also). Make sure the brush is just slightly larger than the spot you are trying to remove.
You also have the option to adjust the opacity of your "Clone" or "Heal" spot. For this type of spot, I am going to leave the opacity at 100. However, if you were working on skin, you may find that you adjust the opacity to keep the skin looking natural.
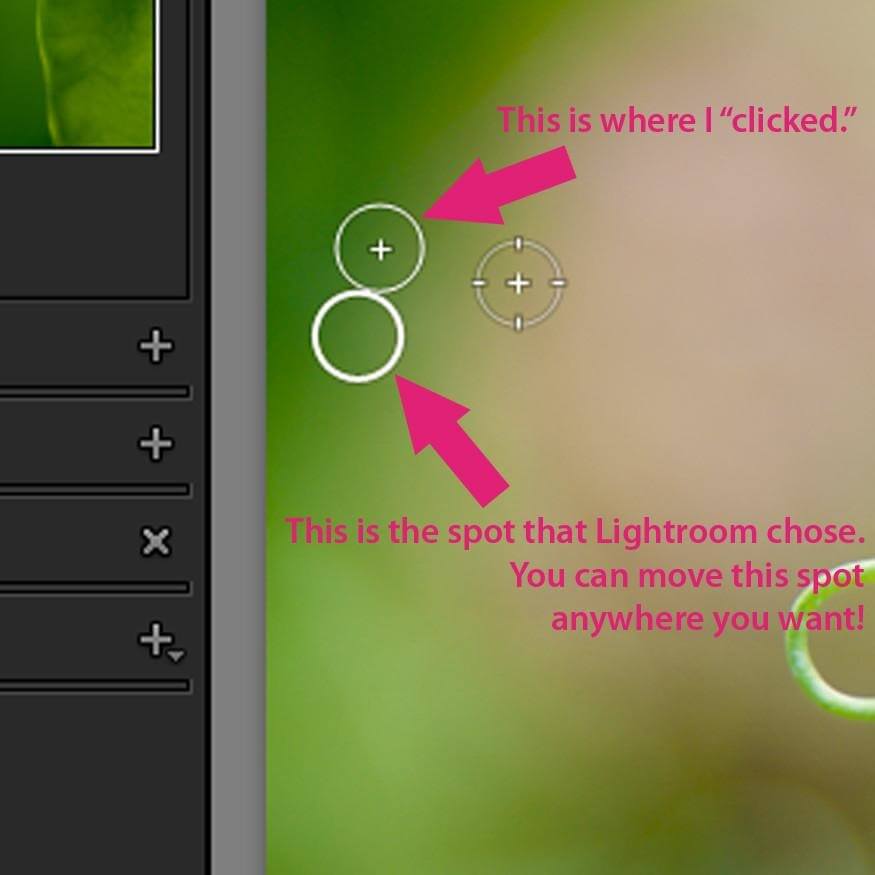
Now, I am going to hover over the spot and "click!" Like magic your spot will disappear. Lightroom automatically choose the spot it is going to Clone or Heal from. However, you have full control to move it where it looks best. AND you can move it ANYWHERE on the photo!
The best part is that you don't have to do this to each individual photo. First, select a group of photos that all have the same spot. (Hint: This works really well for a dust spots, but not so well for healing acne on the skin as people tend to move a little each time the shutter is clicked so the spot will not be in the same spot in every frame!)
Next, "click" the Lightroom Sync button. Then, make sure that the "Spot Removal" box is checked. Last, hit "Synchronize!" Now, like magic, the spot will be removed from every photo!
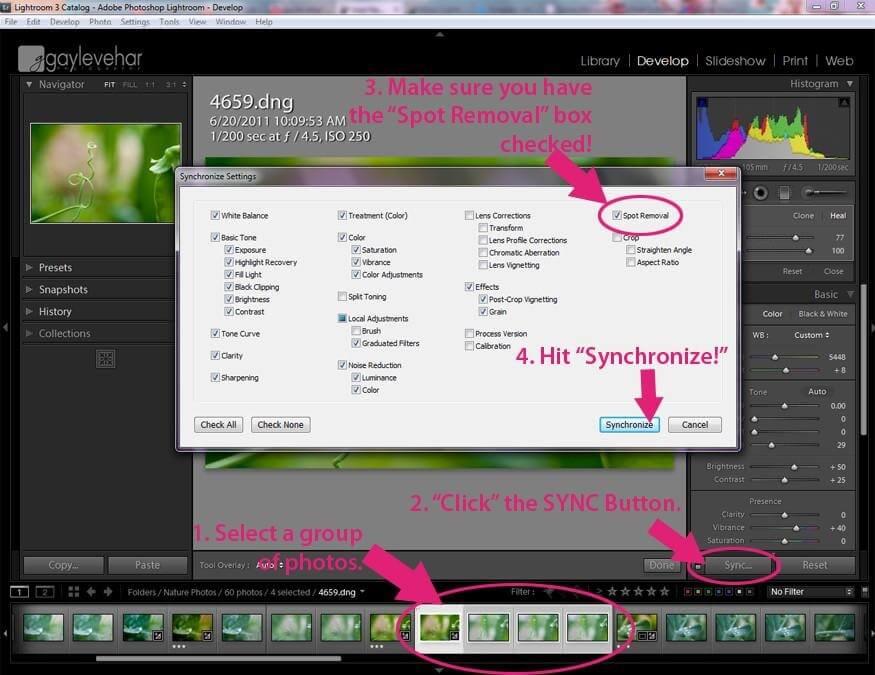
REMEMBER, that if you don't like the way that it "SYNC"ed the spot in one of the photos. You can go in and change it. Just pick the photo, select the "Spot Removal" Tool, hover over where the spot you just removed, and move the circle Lightroom chose to a spot that looks better!!
I hope this helps you fix all those bothersome dust spots!
Do you have any questions or comments about Using the Lightroom Spot Healing? Just leave us a comment below - we would LOVE to hear from you! And PLEASE SHARE this post using the social sharing buttons (we really appreciate it)!



Hi!! I am Gayle. I am a wife to my handsome husband and mom to 4 beautiful kids. In my spare time, I am a photographer and blogger at Mom and Camera. I have a passion for sharing my love of photography with others. I teach local photography classes and regularly share photography tips and tricks on my blog. I hang out there a lot—I’d love you to stop by and visit!

Comments