- Lightroom Presets
- Mobile Presets
-
Photoshop
-
Learn
-
Support
-
Install
- Best Sellers
- Blog
By Gayle Vehar on | No Comments

Honestly, this is the most unglamorous part of teaching people to shoot in manual mode. No one wants to hear that they will have to practice over and over to get this down. We want everything RIGHT NOW! We want to read about it one day and be perfect at it the next.
But the truth is that you will need to practice this over and over for a while before you get it down perfectly.
And then, you will have to practice even more before you can do it quickly during a session. And you will have to practice even more until your fingers move across the camera buttons without thinking.
That is the honest, unglamorous truth!
However, with that being said, there are a couple of tips I can share with you to help you in your manual mode practice:
Sometimes the most overwhelming thing about shooting in manual mode is knowing where to start with all your camera settings.
When I begin choosing my camera settings, I typically ask myself, "What are the two most important camera settings for the photo I want to take." The answer generally varies depending on the look I want to achieve as well as the subject of the photo.
Here are some examples of photos you might want to take and how to choose the best camera settings:
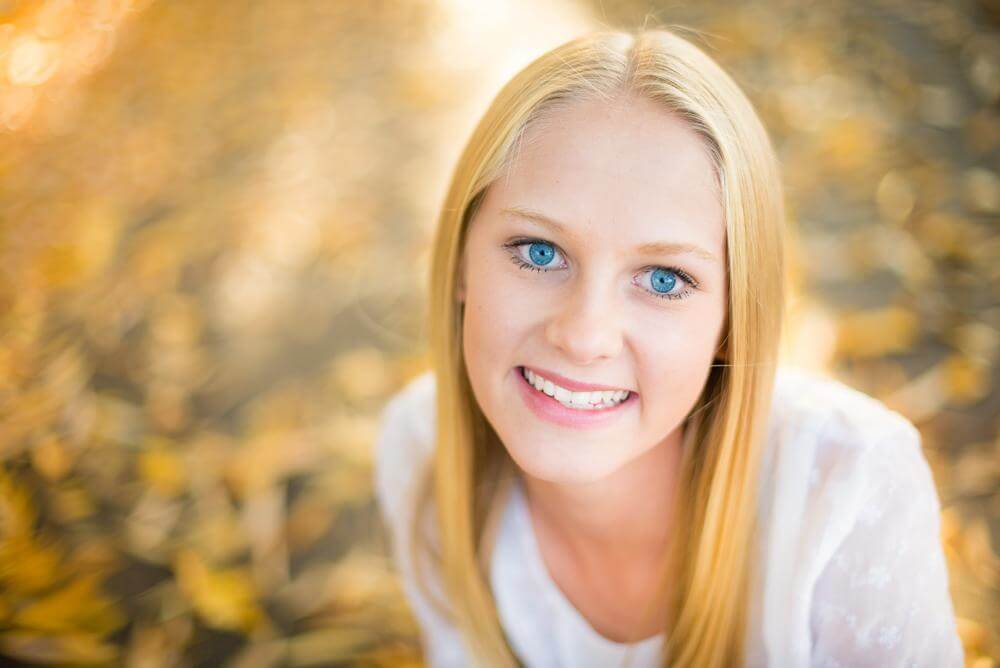
When taking outdoor portrait photos, the most essential settings are the aperture and ISO. Personally, I want my aperture to be wide-open, so I get a nicely blurred background. I also want the ISO as low as possible to avoid as much noise as possible (if needed, noise can be reduced in Lightroom during post-processing). Once the aperture and ISO are set, you can then adjust the shutter speed to compensate for the other two settings to achieve a nicely exposed photo.
For the photo below, I chose an aperture of f/1.8 and an ISO of 100. I moved my shutter speed to 1/320 to get the perfect exposure. (I shot this with my 50mm f/1.4)

Remember that even if you're shooting in the exact same outdoor light, you might want to choose entirely different settings.
For example, Let's say you are photographing small children. In this case, you should first set your aperture and shutter speed (keeping the shutter speed no lower than 1/250) and then adjust the ISO to compensate for the other two settings to achieve a good exposure. And If you have set your ISO to 100 and still have too much light coming in, bump up your shutter speed until it is balanced.
For a landscape photo, the most important settings will be your aperture and ISO. First, you will want to choose an aperture that will allow you to have EVERYTHING in your scene in focus. Smaller apertures (higher numbered f-stops) will give you the most field depth, so everything is in focus. You would also want to set your ISO as low as possible to allow for the least amount of noise.
For the landscape photo below, I set my aperture at f/9 and my ISO at 500. My shutter speed was 1/500th of a second. It was taken right as the sun had set on a very windy evening while I was hand-holding the camera. Looking back, I could have closed my aperture a bit more, lowered my ISO a little, and still produced a great image.

The most significant difference between an indoor portrait and an outdoor portrait is the amount of light you will have, which, as you can imagine, will be less.
For an indoor portrait, the most essential settings will be the aperture and shutter speed. I set my aperture as low as I am comfortable (I have practiced a lot and regularly shoot at f/1.4 -- but you may not want to start that wide open your first time). Then, I set my shutter speed to a reasonable number to get a sharp photo and raise my ISO as high as needed to compensate for the other two settings.
When raising ISO, you should know that your photos will likely have more grain. However, a well-exposed photo will show less grain than an underexposed photo you then have to brighten during post-processing.
In the photo below, I set my aperture to f/2.8 and my shutter speed to 1/125 and then raised my ISO to 2000 - a common occurrence when photographing indoors.

As you practice manual mode, try not to compare your photos or photography skills to others - this is practice!
Do not worry about creating perfect photos. Just focus on learning these essential basic skills.
I promise doing this will make you a better photographer!
And if you are able, challenge yourself to take at least one photo in manual mode every day for a month. Use different lighting situations and subject scenarios for this challenge. You will start feeling more confident in your ability to shoot in manual mode very quickly!
Don't miss the rest of our series to help you Master Manual Mode. If you missed any of these posts, you can read/review them anytime by clicking these links!
Day 1. Why Shoot in Manual Mode
Day 2. How to Use Your Camera's Light Meter
Day 3. Aperture for Beginners
Day 4. Shutter Speed for Beginners
Day 5. ISO for Beginners
Day 6. Perfect Exposure: Putting it All Together
Bonus: free downloadable Mastering Manual Cheat Sheet for use on the go!


Hi!! I am Gayle. I am a wife to my handsome husband and mom to 4 beautiful kids. In my spare time, I am a photographer and blogger at Mom and Camera. I have a passion for sharing my love of photography with others. I teach local photography classes and regularly share photography tips and tricks on my blog. I hang out there a lot—I’d love you to stop by and visit!

Comments