-
Lightroom Presets
- Mobile Presets
-
Photoshop
-
Learn
-
Support
-
Install
- Best Sellers
- Blog
By Anna Gay on | No Comments

Have you ever wondered how to make a diptych in Lightroom? Not only is it possible, it is simple, though not completely obvious, seeing as how it is in the Print module, not Develop. Here’s how: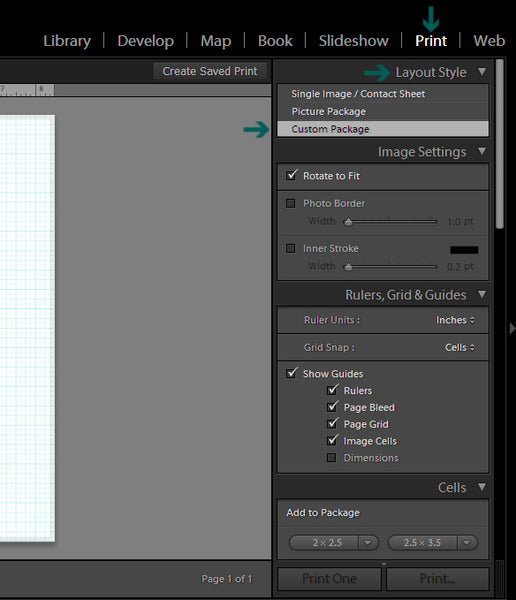
Once you have your two images edited and ready to be diptyched (not a word, but I’m pretending it is) select the Print module in Lightroom. Under Layout Style, select Custom Package.
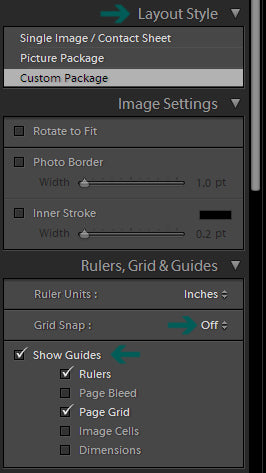
Under Rulers, Grid & Guides, turn Grid Snap off, and under Show Guides, you can check or uncheck which boxes suit your needs. I like to have Rulers and Page Grid displayed, as this helps me line up my photos evenly.
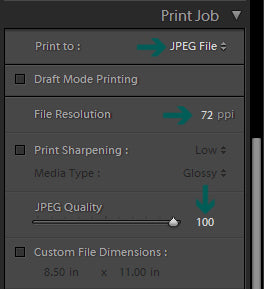
Even though you are exporting this photo as a file and not a print job, you will still need to fill in some specifics under the Print Job header.
Print To: JPEG File
File Resolution: 72ppi
LR defaults to 300ppi for printing, but if you are exporting your diptych for the web, 72ppi is what you need.
JPEG Quality: Optional
Keep in mind that the higher the quality number, the larger the file will be, but the better the image will look on your screen.
Custom File Dimensions: Customize to your image sizes
Depending on your printer settings, LR will most likely default Custom File Dimensions to 8.5 X 11. You can change this by checking the box next Custom File Dimensions. File dimensions are complicated depending on a) the type of camera you used and b) if you cropped the image during post processing.
As a general rule of thumb, a DSLR will have an aspect ratio that is approximately 4X6, so I have set my file dimensions to 6X4 (my images are vertical) but these values can vary based on image size, shape, etc.
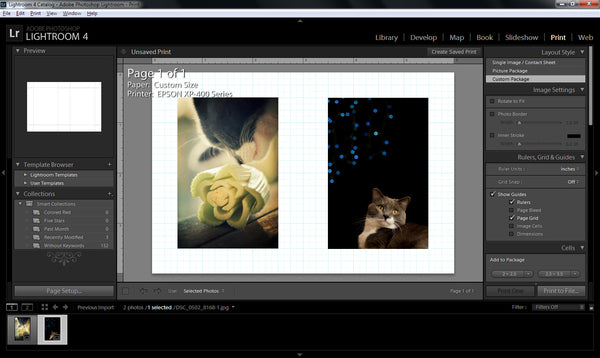
Drag and drop the images on your Film Strip (bottom left) onto the blank page and arrange them to your liking. Again, I like to use the gridlines to help me line up my images.
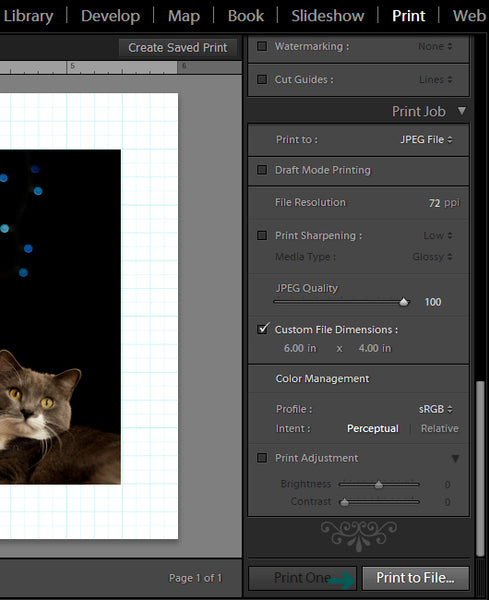
When you are finished, select Print to File to export your diptych.
That’s all there is to it!


Comments