- Lightroom Presets
- Mobile Presets
-
Photoshop
-
Learn
-
Support
-
Install
- Best Sellers
- Blog
By Anna Gay on | No Comments

When I first became interested in off-camera flash, I was completely overwhelmed by the amount of information I found online, and didn’t even know where to begin!
But I was determined to learn it because I knew how incredibly helpful taking a flash setup on the go can be for portrait shoots, product shoots, real estate shoots, commercial shoots, studio lighting and more!
While off-camera flash techniques are many and varied, I thought I would share the way in which I put together my first off camera flash setup and what gear was needed, in the hopes that it will help you more easily create your own set up.
Like I said, there are plenty of options out there, but this is a GREAT solution if you already have a flash for your camera. Not the pop-up flash, but a separate flash that is mounted on your camera’s hot shoe.

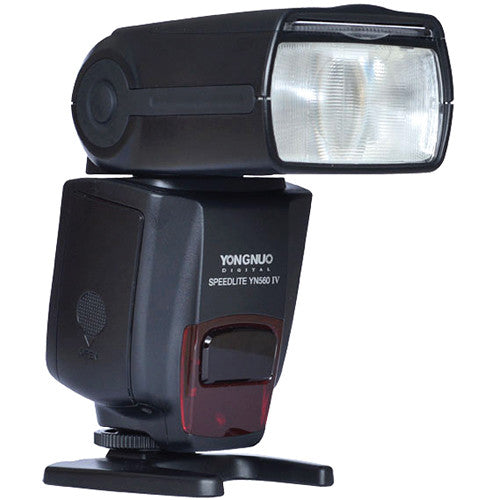
Like mentioned above, one of the first items you'll need for an off-camera flash setup is a flash that can be removed from the camera. Your camera manufacturer will likely make a couple of flash models that will be compatible with your camera. The brand name flash units are typically fairly expensive.
There are several off-brand flash units that are considerably less expensive and still high quality flashes that will work very well in this kind of setup. You can find several of these at both Amazon and B&H Photo Video.

In order to fire the flash off-camera using this method, you will need a set of triggers. In my experience, Cactus and PocketWizard are great products and work in similar fashions. I started off with Cactus Triggers.
The way the triggers work is that you have two pieces of equipment – a trigger, and a receiver. The trigger attaches to your camera’s hot shoe mount, and the flash to the receiver. When the shutter release button is pressed on your camera, the trigger emits a frequency to the receiver that will then fire the flash.
You will just need to make sure that your trigger and receiver are set to the same channel (there is a dial on the side of each that will let you select the channel).
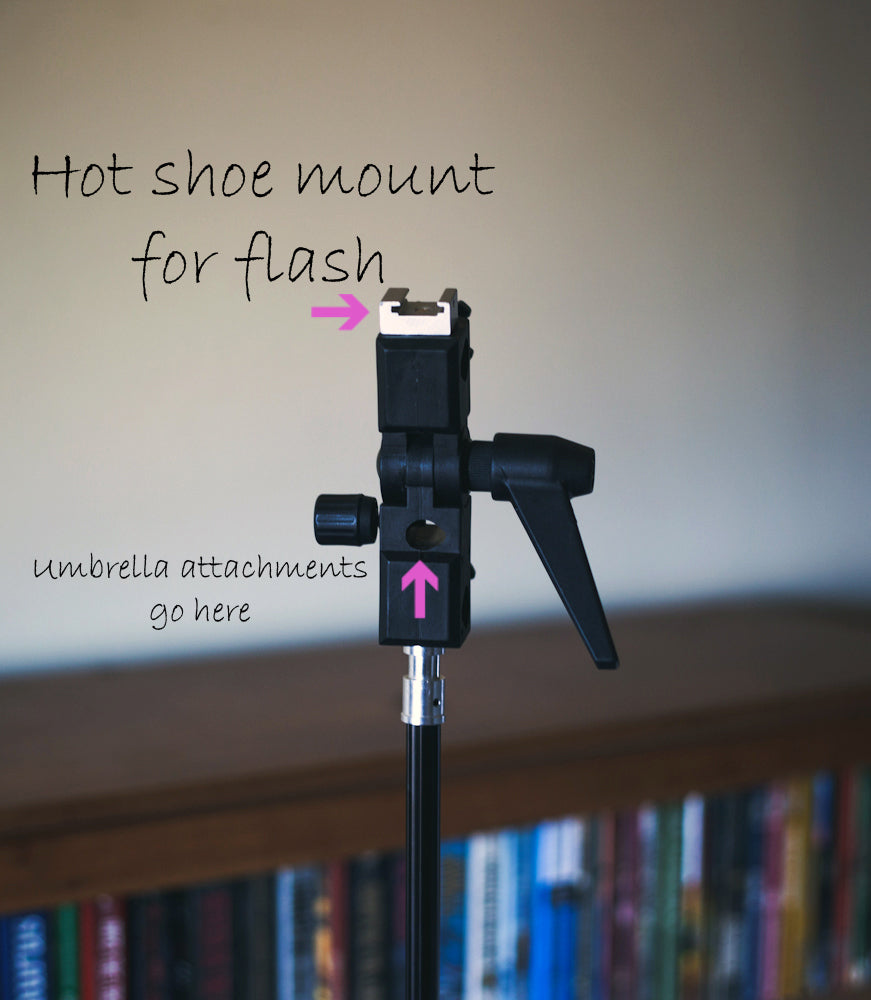
At this point, you may find it helpful to purchase a light stand kit, which will come with a light stand, a hot shoe mount that you will use to attach your flash to the light stand, and various diffusers to soften and direct the light from your flash. Here is a great starter kit.
Light stands typically come with a screw mount, which allows you to change out what type of head you put on the light stand, as different lights require different heads. For a flash, you will need a hot shoe mount. Attached to the flash, it looks like this (the flash is on top):

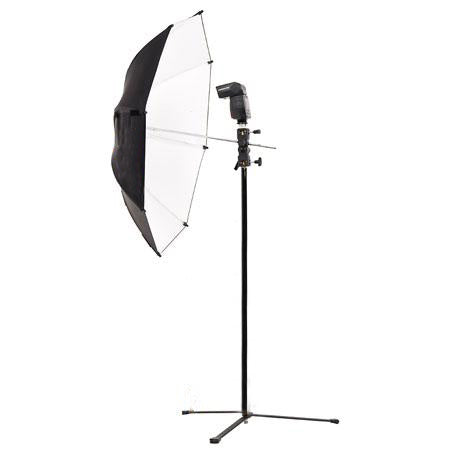
With the kit I linked above from Amazon, you will also get flash umbrellas, which will soften and diffuse the light, in order to prevent harsh shadows your subject. In the image above, you will see the silver rod going through the hot shoe mount – that is where you attach your umbrella. As you can see here, this is what it looks like when you put it all together:

What I love about this setup is that it is compact, and can be used anywhere – everything is battery powered, so no electrical outlet is required. This certainly isn’t the most powerful lighting setup, but will be perfect for creating just enough light for portraits, weddings, and even fill flash in outdoor settings.
Now I will show you how to get everything in place before you begin shooting with off camera flash.
These are basics of getting your flash and triggers set up. I definitely encourage you to read the manuals on both your triggers and your flash, as well!
Attach one of the triggers (it does not matter which one) to the flash hot shoe mount on your light stand. In the meantime, make sure both your triggers and your flash are turned OFF to prevent accidental flash firing:
Attach your flash unit to the cold shoe mount on the trigger (it looks like the hot shoe on top of your camera), just like you would attach it to the hot shoe on your camera:
Attach the other trigger to your camera’s hot shoe mount:
On the side of each of your triggers, you will see the TX/OFF/RX switch. TX stands for "transmitter mode" and RX stands for "receiver mode".
Now, the trigger on your camera will transmit a signal to the trigger attached to your flash, which means that you need to set the trigger that is on your camera to TX (transmitter mode):
…and set the trigger on your flash to RX (receiver mode):
Finally, in order to fire the flash, you need to make sure that both triggers are set to the same channel. In this case, I have them both set to channel 1:
Voila! You are now set to fire your flash off camera! Have fun experimenting with the light and make sure to look for opportunities to use your new skills. The more you play and practice, the better your images will be!
Do you have any questions or comments about an Off Camera Flash Set Up and Gear? Leave us a comment below - we would LOVE to hear from you! And PLEASE SHARE our tutorial using the social sharing buttons (we really appreciate it)!


Anna Gay is a portrait photographer based in Athens, GA and the author of the dPS ebook The Art of Self-Portraiture. She also designs actions and textures for Photoshop. When she is not shooting or writing, she enjoys spending time with her husband, and their two cats, Elphie and Fat Cat.

Comments