-
Lightroom Presets
- Mobile Presets
-
Photoshop
-
Learn
-
Support
-
Install
- Best Sellers
- Blog
By Anna Gay on | No Comments

If you are new to Lightroom (or not so new, as this took me a while to figure out), you may be a bit confused about how to resize images in Lightroom. For the longest time, I searched high and low for the resize option but came up empty-handed!
I previously used Photoshop to resize, but once I figured out how to resize in Lightroom, I realized it's a piece of cake and use Lightroom for all my resizing now!
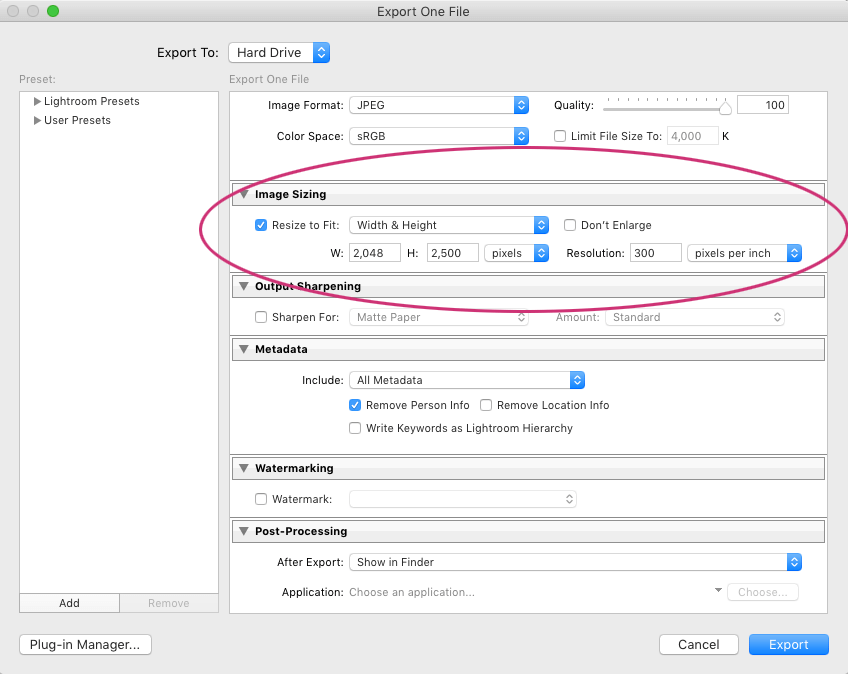
You will find the resize option in your Export dialogue. So, go to your top toolbar, select File, Export, and you will see this box:

Once you see the above box, use the arrow on the right to scroll down until you see Image Sizing, then check the “Resize to Fit” box.
At this point, you will have several options for resizing, so let’s look at how they work:
With all of the resizing options, you can choose your dimensions in either pixels, inches, or centimeters, and you can also select your resolution. In the example below, I am using pixels with a measurement of 2048 X 2500. This is the quick, easy, and custom way to set your pixels and resolution.

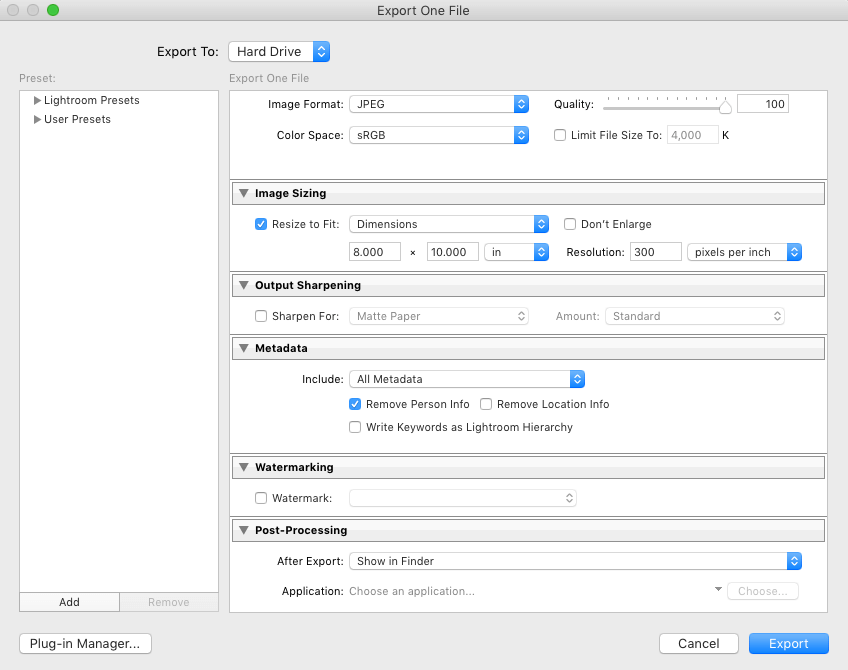
As you can see below, I changed my dimensions to inches and entered 8 X 10. Don't confuse this function with cropping in Lightroom. Note: if you haven't cropped your image in Lightroom before exporting using this method, Lightroom will resize the image as close as possible to the dimensions you entered but may not get it exact. Cropping your image to the 8x10 aspect ratio before exporting will ensure that the image fits those dimensions perfectly.

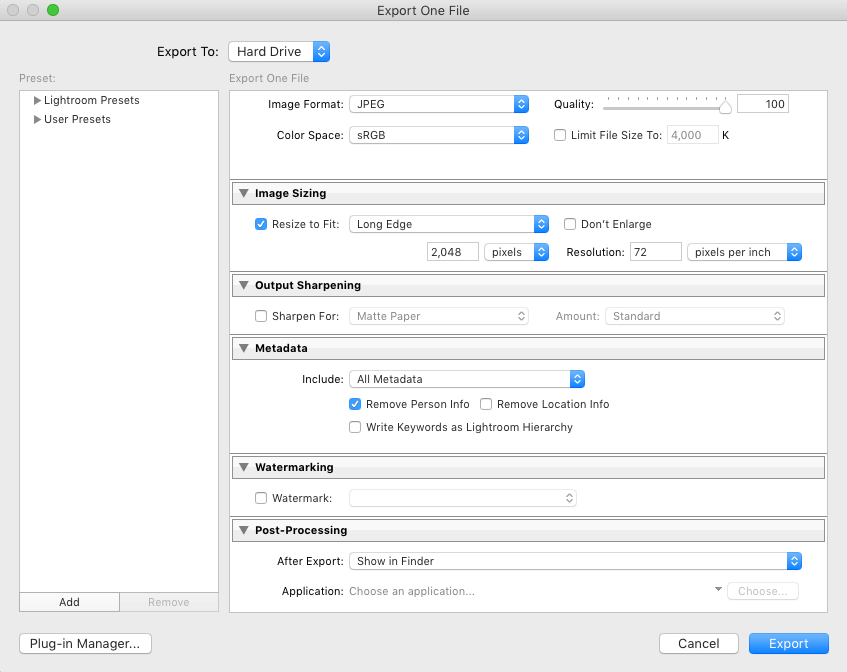
With this feature, you can choose to edit either the long or short edge of your image, and Lightroom will automatically adjust the remaining dimensions for you. This is extremely handy if you are editing a photo for online sharing, as websites and blogs often require a specific pixel measurement on one edge of the image.

Another important factor to keep in mind is resolution. If you are editing for the web, a resolution of 72 pixels per inch is more than enough for screen display; however, if you are going to make a large print, you will want a high resolution of 240-300 PPI.
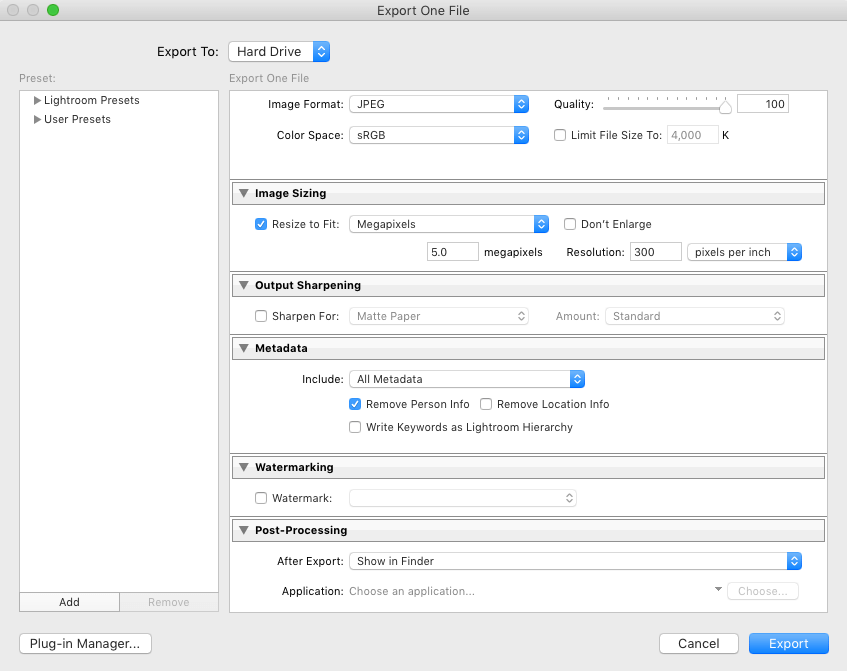
If actual file size is a factor in your export, you can set your megapixels. This is an excellent option if you are not bound by specific dimensions but rather by file size.
This feature is handy for submitting images to competitions or if specific websites have a maximum file size allowed when uploading. This feature is also helpful if you are emailing your photos or simply do not want to use too much space on your blog or website.

Another useful trick in your Export dialogue is the ability to create presets for your commonly used dimensions. To make your own sizing preset, first set the export settings exactly how you want them in the Export dialogue box. Then in the Export dialogue, select Add (lower-left side of the box, above the Plug-In Manager button).

Once you have named your preset, click Create. In the future, you will find your preset under the User Presets options on the left side of the dialog box and be able to apply those same settings to your other images quickly.
As you probably know, one of the most significant benefits of Lightroom is its non-destructive editing. So, with this feature, you can resize your images in Lightroom without worrying about accidentally overwriting your original image with a smaller version.
Many times I have accidentally overwritten my original edit with a smaller version in Photoshop, destroying the original forever.
Lightroom does not overwrite the original when you resize. It is possible to do, but you really have to go out of your way to tell it to overwrite the file. If a file is about to be overwritten, Lightroom will ask you if you want to overwrite the original file or use unique names. Always select “Use Unique Name” to be on the safe side.
Do you have any questions or comments about Resizing Images in Lightroom? Leave us a comment below - We would LOVE to hear from you! And PLEASE SHARE this post using the social sharing buttons (We really appreciate it)!


Anna Gay is a portrait photographer based in Athens, GA and the author of the dPS ebook The Art of Self-Portraiture. She also designs actions and textures for Photoshop. When she is not shooting or writing, she enjoys spending time with her husband, and their two cats, Elphie and Fat Cat.

Comments